Satisfy Your Cravings: How to Make Biscuits without Baking Powder or Baking Soda

Biscuits are a beloved comfort food that can be enjoyed for breakfast, lunch, or dinner. However, if you don’t have baking powder or baking soda on hand, you may be wondering if it’s still possible to make delicious biscuits. The good news is that you can make biscuits without these leavening agents, and they can be just as tasty and fluffy as their traditional counterparts. In this article, we’ll show you how to make biscuits without baking powder or baking soda.

Make Biscuits without Baking Powder or Baking Soda

Ingredients

2 cups of all-purpose flour

1 tablespoon of granulated sugar

1 tablespoon of baking powder

1/2 teaspoon of salt

1/2 cup of unsalted butter, chilled and cubed

3/4 cup of milk

Instructions

Preheat your oven to 425°F (218°C) and prepare a baking sheet by lining it with parchment paper.

In a large mixing bowl, whisk together the flour, sugar, baking powder, and salt.

Add the cubed butter to the dry ingredients and use a pastry cutter or your hands to work the butter into the flour mixture until it resembles coarse crumbs.

Gradually add the milk to the mixture and stir until just combined. The dough should be moist but not overly sticky.

Turn the dough out onto a floured surface and knead it gently for about 1 minute. Be careful not to overwork the dough, as this can result in tough biscuits.

Flatten the dough to a thickness of about 1/2 inch and use a biscuit cutter or a round cookie cutter to cut out the biscuits. Place the biscuits on the prepared baking sheet, leaving about 2 inches of space between each one.

Bake the biscuits for 12-15 minutes or until they are golden brown on top. Remove them from the oven and allow them to cool for a few minutes before serving.

Tips and Variations

To add extra flavor to your biscuits, you can mix in shredded cheese, chopped herbs, or cooked bacon bits.

If you don’t have a biscuit cutter or a round cookie cutter, you can use the rim of a drinking glass to cut out the biscuits.

For a sweeter biscuit, you can increase the amount of sugar in the recipe to 2-3 tablespoons.

You can also brush the tops of the biscuits with melted butter or honey before baking for added flavor and shine.

FAQ’s

Can I use self-rising flour instead of all-purpose flour for making biscuits without baking powder or soda?

No, you should not use self-rising flour for this recipe as it already contains baking powder and salt. Using self-rising flour will result in over-leavened and overly salty biscuits. Stick to all-purpose flour and use the ingredients and measurements as listed in the recipe.

My biscuits turned out dry and tough. What did I do wrong?

It’s possible that you overworked the dough while kneading it or flattened the dough too much before cutting out the biscuits. Overworking the dough develops gluten, which can result in tough biscuits. Additionally, flattening the dough too much can cause the biscuits to be thin and dry. Next time, handle the dough gently and avoid over-kneading it. Also, make sure to keep the dough at a thickness of at least 1/2 inch when cutting out the biscuits.

Can I make these biscuits ahead of time and reheat them later?

Yes, you can make these biscuits ahead of time and reheat them in the oven or microwave before serving. To reheat in the oven, place the biscuits on a baking sheet and warm them in a preheated oven at 350°F for about 5-7 minutes or until heated through. To reheat in the microwave, wrap the biscuits in a damp paper towel and microwave them for about 10-15 seconds or until warm. However, keep in mind that freshly baked biscuits are always the best, and reheating them may affect their texture and flavor.

Conclusion

Making biscuits without baking powder or baking soda is not only possible but also easy and delicious. With just a few simple ingredients and some basic kitchen tools, you can whip up a batch of fluffy and satisfying biscuits that will satisfy your cravings any time of day. Give this recipe a try and enjoy the warm and buttery goodness of homemade biscuits in no time.

How long can you keep buttercream frosting?

Buttercream frosting is a versatile and delicious topping for cakes, cupcakes, and other baked goods. While it is easy to make, it can be time-consuming, especially if you need to make a large batch. Fortunately, buttercream frosting can be frozen for later use, saving time and effort. Here’s how to freeze buttercream frosting properly.

Freezing Buttercream Frosting: How to Do it Properly

Preparation

Before freezing buttercream frosting, it is important to make sure it is fresh and properly made. Frosting that is made with expired or contaminated ingredients may spoil quickly, even when frozen. Make sure to use fresh butter, powdered sugar, and other ingredients, and follow the recipe carefully. Once the frosting is made, let it cool to room temperature before freezing.

Storage

To freeze buttercream frosting, transfer it to an airtight container or plastic bag. Make sure to label the container with the date and type of frosting, so you can easily identify it later. Squeeze out any excess air from the container or bag before sealing it tightly. This will prevent freezer burn and keep the frosting fresh.

Freezing

Place the container or bag of buttercream frosting in the freezer. Make sure to keep it away from any items that may cause it to become damaged, such as sharp edges or other frozen items. Ideally, the frosting should be frozen as quickly as possible to prevent the formation of ice crystals. If possible, use a freezer with a quick-freeze function or place the frosting in the coldest part of the freezer.

Thawing

When you’re ready to use the frozen buttercream frosting, remove it from the freezer and place it in the refrigerator overnight to thaw. This will allow the frosting to thaw slowly and evenly, preventing any damage to the texture or consistency. Once thawed, you may notice that the frosting has separated or become grainy. This is normal and can be fixed by re-whipping the frosting until it becomes smooth again.

Using Frozen Buttercream Frosting

Once the frozen buttercream frosting has been thawed and re-whipped, it can be used just like freshly made frosting. Use it to top cakes, cupcakes, or any other baked goods as desired. Keep in mind that frozen frosting may not be as smooth as freshly made frosting, so you may need to adjust the texture by adding more liquid or powdered sugar as needed.

FAQs

How long can I freeze buttercream frosting?

 Buttercream frosting can be frozen for up to three months if stored properly in an airtight container or plastic bag. Make sure to label the container with the date and type of frosting so you can easily identify it later. Thaw the frosting in the refrigerator overnight before using it.

Can I freeze buttercream frosting with decorations on it?

While it is possible to freeze buttercream frosting with decorations on it, it is not recommended. The decorations may become damaged or lose their shape during the freezing process, resulting in a less attractive appearance. It is better to freeze the frosting without decorations and add them later once the frosting has thawed.

Can I freeze buttercream frosting that has been refrigerated?

 Yes, you can freeze buttercream frosting that has been refrigerated. Make sure that the frosting is completely cooled to room temperature before freezing it. Transfer it to an airtight container or plastic bag, and label it with the date and type of frosting. Thaw the frosting in the refrigerator overnight before using it, and re-whip it to restore its texture.

Conclusion

In conclusion, freezing buttercream frosting is a great way to save time and effort when baking. By following these simple steps, you can ensure that your buttercream frosting stays fresh and delicious for up to three months. Whether you’re preparing for a big event or just want to have frosting on hand for a quick dessert, freezing buttercream frosting is a convenient and easy option.


What are Seder Plates and what food is specifically served on them.

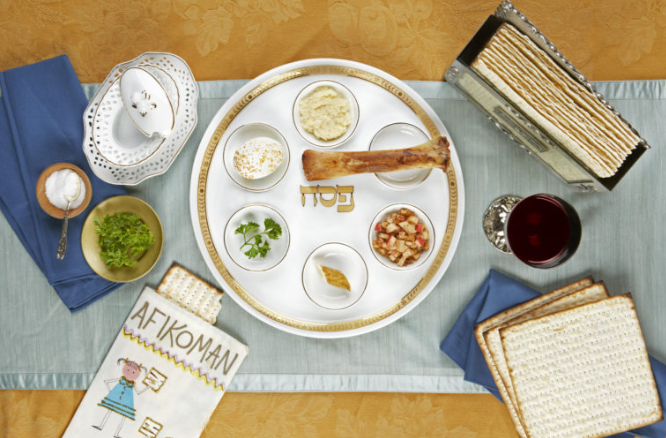
Seder Plates are beautifully designed religious serving dishes that are specifically used during the Jewish Festival of The Passover, and can be ordered from an elite company such as cazenovejudaica.com.  There are usually six different foods that are served on these very special plates during a very important time of the year for the Jewish people. A roasted shankbone or  Zeroa is the only element of meat served and symbolises the Lamb of God.  A roasted, hard boiled egg, or Beitza, symbolises the sacrifice that was given at the Temple of Jerusalem. Some Horseradish or Maror which symbolises the bitterness the slaves felt in Egypt. An onion, or Chazeret representing all the tears that were shed by the Jewish people. Some fresh sprigs of parsley or Karpas which symbolise the hope and sense of renewal that the Passover Festival gives the Jewish community of today.

Preventing Stains on Baking Trays

Baking trays are a staple in any kitchen and are used to cook a wide variety of foods, from cookies and cakes to roasted vegetables and meats. However, baking trays can quickly become stained with stubborn food residues that are hard to remove. Fortunately, there are simple ways to prevent stains from forming on your baking trays. In this article, we’ll share some tips on how to prevent stains on baking trays.

Preventing Stains on Baking Trays

Line Your Baking Tray

One of the easiest ways to prevent stains on baking trays is to line them with parchment paper or aluminum foil before use. This is particularly useful when cooking foods that are known to stick or release a lot of greases, such as cookies or bacon. The lining will protect the tray from direct contact with the food, making it easier to clean and preventing any stains from forming.

Avoid Using Metal Utensils

Metal utensils can scratch the surface of your baking trays, creating tiny grooves where food can get trapped and stuck. This can lead to stubborn stains that are difficult to remove. To prevent this from happening, use non-metal utensils such as silicone or wooden spoons and spatulas when cooking or serving food on your baking tray.

Clean Your Baking Tray Immediately

One of the most effective ways to prevent stains on baking trays is to clean them immediately after use. This is because food residues can harden and stick to the tray if left for too long, making them much harder to remove. To avoid this, rinse the tray with hot water and dish soap as soon as you’re done using it, using a soft sponge or brush to remove any debris or stains.

Use a Non-Stick Baking Spray or Oil

Using a non-stick baking spray or oil can prevent food from sticking to your baking tray, making it much easier to clean and preventing any stains from forming. Simply spray or brush a thin layer of the spray or oil onto the surface of the tray before use, making sure to cover all areas evenly.

FAQs

Can I use regular cooking spray to prevent stains on my baking tray?

Yes, you can use regular cooking spray to prevent stains on your baking tray. However, it’s important to note that not all cooking sprays are created equal. Some cooking sprays may contain additives that can leave a residue on your baking tray, which can create stains over time. It’s best to use a non-stick baking spray specifically designed for use on baking trays, which will help prevent food from sticking and keep your tray looking clean and spotless.

Can I clean my baking tray with abrasive cleaning tools to remove stains?

It’s not recommended to use abrasive cleaning tools, such as steel wool or abrasive sponges, to clean your baking tray as they can scratch the surface, creating tiny grooves where food can get trapped and stuck. Instead, use a soft sponge or brush with hot water and dish soap to remove any debris or stains from your tray. If the stains are particularly stubborn, you can use a baking soda paste or white vinegar solution to help break them down, but always avoid using abrasive tools that can damage the surface of your tray.

Do I need to preheat my baking tray before using it to prevent stains?

Answer: No, preheating your baking tray is not necessary to prevent stains. However, preheating your tray can help prevent food from sticking and improve the overall cooking process. It’s important to note that preheating a non-stick baking tray for too long can damage the non-stick coating and make it more prone to stains. Follow the manufacturer’s instructions for preheating your tray, and always allow it to cool before cleaning to avoid warping or damaging the surface.

Conclusion

Preventing stains on baking trays is all about taking proactive measures to protect the surface of the tray from direct contact with food residues. By lining your tray with parchment paper or aluminum foil, avoiding metal utensils, cleaning your tray immediately after use, and using a non-stick baking spray or oil, you can keep your baking trays looking clean and spotless for longer. With these tips, you’ll be able to enjoy all your favorite baked goods without worrying about the hassle of cleaning stubborn stains.

Is Almond Milk Vegan?

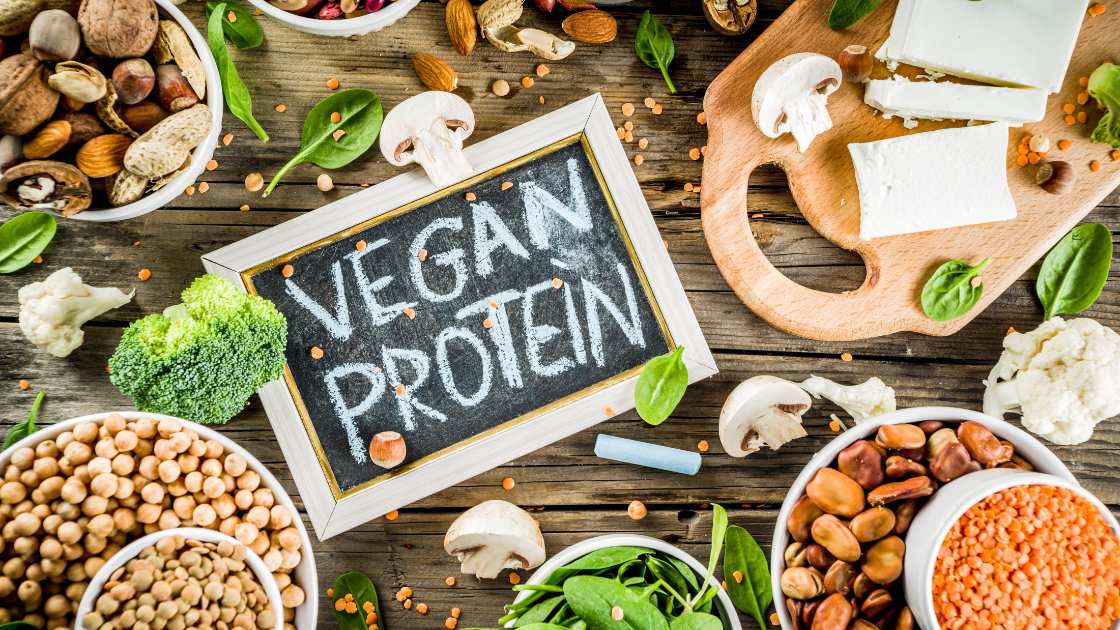
Almond milk has become a popular plant-based milk alternative in recent years, particularly among those who follow a vegan lifestyle. However, some people may wonder whether almond milk is actually vegan or not. In this article, we will explore the question of whether almond milk is a vegan-friendly option.

What is Almond Milk?

Almond milk is a plant-based milk alternative made by blending almonds and water. The resulting mixture is then strained to remove any solid particles, resulting in a smooth and creamy liquid that is similar in texture to cow’s milk. Almond milk is often fortified with additional vitamins and minerals, such as calcium, vitamin D, and vitamin B12.

Is Almond Milk Vegan?

Yes, almond milk is considered to be vegan. Since it is made entirely from plant-based ingredients, almond milk does not contain any animal products or byproducts. As such, it is a suitable alternative for those who follow a vegan diet or lifestyle.

Benefits of Almond Milk for Vegans

Almond milk offers a range of benefits for vegans, including:

Nutrient-rich: Almond milk is often fortified with additional vitamins and minerals, such as calcium, vitamin D, and vitamin B12. This can help vegans ensure that they are meeting their daily nutrient requirements.

Low in calories: Almond milk is generally lower in calories than cow’s milk, making it a good option for those who are trying to maintain a healthy weight.

Versatile: Almond milk can be used in a variety of ways, such as in coffee, smoothies, and baking. This makes it a versatile ingredient that can be used in a range of vegan recipes.

Environmentally friendly: Producing almond milk requires less water and produces fewer greenhouse gas emissions than producing cow’s milk. As such, consuming almond milk can be seen as a more environmentally friendly choice.

FAQ’s

Is almond milk vegan?

Yes, almond milk is considered to be vegan. Since it is made entirely from plant-based ingredients, almond milk does not contain any animal products or byproducts.

What are the benefits of almond milk for vegans?

Almond milk offers a range of benefits for vegans, including:

Nutrient-rich: Almond milk is often fortified with additional vitamins and minerals, such as calcium, vitamin D, and vitamin B12. This can help vegans ensure that they are meeting their daily nutrient requirements.

Low in calories: Almond milk is generally lower in calories than cow’s milk, making it a good option for those who are trying to maintain a healthy weight.

Versatile: Almond milk can be used in a variety of ways, such as in coffee, smoothies, and baking. This makes it a versatile ingredient that can be used in a range of vegan recipes.

Are there any potential drawbacks to consuming almond milk as a vegan?

While almond milk can be a great option for vegans, it is important to note that some store-bought varieties may contain additives such as sweeteners and thickeners. Additionally, almond milk may not be suitable for those with nut allergies. It is always important to read the ingredient list and check with a healthcare provider if you have any concerns about consuming almond milk.

Conclusion

In conclusion, almond milk is a vegan-friendly milk alternative that can provide a range of benefits for those who follow a vegan diet or lifestyle. Not only is it nutrient-rich and versatile, but it is also environmentally friendly and can be used in a range of vegan recipes. So, if you are looking for a plant-based milk alternative, almond milk may be a great option for you.

How to Store Cooked Food: A Comprehensive Guide

Storing cooked food properly is an essential skill for any home cook or chef. Proper storage not only ensures that your food stays fresh, but it also helps to prevent foodborne illness. In this article, we’ll provide you with a comprehensive guide on how to store cooked food effectively, including tips and tricks for storing various types of foods.

Cool Food Down Properly

Before storing cooked food, it is essential to cool it down properly. Cooling food down quickly is essential because bacteria grow rapidly at temperatures between 40°F and 140°F. To cool food down quickly, divide it into smaller portions and place it in shallow containers. Then, place the containers in the refrigerator or freezer. You can also place the containers in an ice bath to speed up the cooling process.

Use Appropriate Containers

When storing cooked food, it is essential to use appropriate containers. Choose containers that are airtight and leak-proof to prevent moisture from escaping and air from entering. Glass or plastic containers with tight-fitting lids are an excellent option. You can also use resealable plastic bags, but make sure they are specifically designed for food storage.

Label Your Containers

Labeling your containers is an essential step when storing cooked food. Labeling helps you keep track of what you’ve stored and when you stored it. Write the date and contents on the label, so you know how long the food has been in the refrigerator or freezer. It’s also helpful to include reheating instructions on the label.

Store Food in the Right Place

When storing cooked food, it’s essential to store it in the right place. Some foods should be stored in the refrigerator, while others can be stored in the freezer. Foods that are high in moisture, such as cooked vegetables, should be stored in the refrigerator. Foods that are low in moisture, such as cooked meats, can be stored in the freezer.

Store Food at the Right Temperature

Storing cooked food at the right temperature is essential to prevent bacteria from growing. Keep the refrigerator temperature at 40°F or below and the freezer temperature at 0°F or below. Make sure to keep the refrigerator and freezer doors closed as much as possible to maintain the correct temperature.

Follow Food Safety Guidelines

When storing cooked food, it’s essential to follow food safety guidelines. Avoid storing food at room temperature for more than two hours. If the temperature is above 90°F, food should not be left out for more than one hour. Always wash your hands before handling food and use separate cutting boards for raw and cooked foods.

FAQ’s

Can I put hot food directly into the refrigerator for storage?

No, it’s not recommended to put hot food directly into the refrigerator for storage. Doing so can raise the temperature inside the refrigerator and increase the risk of foodborne illness. Instead, let the food cool down to room temperature before transferring it to an airtight container and placing it in the refrigerator.

How long can I store cooked food in the refrigerator?

Cooked food can typically be stored in the refrigerator for up to four days. However, it’s essential to follow proper storage guidelines to ensure the food stays fresh and safe to eat. Always store food in airtight containers, label them with the date, and keep the refrigerator temperature at 40°F or below.

Can I freeze cooked food more than once?

While it’s technically safe to refreeze cooked food, it’s not recommended. Refreezing can affect the texture and quality of the food and increase the risk of foodborne illness. If you’re not sure if you’ll use all the cooked food within a few days, divide it into smaller portions and freeze only what you’ll need. This way, you can thaw just the amount you need and reduce the risk of waste.

Conclusion

Storing cooked food properly is essential to ensure it stays fresh and safe to eat. Cool food down properly, use appropriate containers, label your containers, store food in the right place and at the right temperature, and follow food safety guidelines. With these tips and tricks, you’ll be able to store cooked food effectively and keep your family safe from foodborne illness.