Learn How Long Does Cake Disposable Last A Comprehensive Guide

When it comes to planning events, parties, or even a simple family gathering, disposable cakeware has become a popular choice for its convenience and ease of use. However, like any other disposable product, cake disposables also have a limited shelf life. In this article, we will explore the factors that influence the longevity of cake disposables and provide insights on how long you can expect them to last.

Understanding the Shelf Life of Cake Disposables: How Long Do They Last?

Material Matters

The material used in the production of cake disposables plays a crucial role in determining their shelf life. Common materials include paper, plastic, and foam. Paper-based cake disposables are generally biodegradable and eco-friendly but may not hold up as well to moisture. Plastic disposables, on the other hand, are more durable but may take longer to decompose. Foam is lightweight and often chosen for its insulation properties, but it may break down over time.

Storage Conditions

Proper storage is essential to extend the shelf life of cake disposables. Exposure to heat, humidity, or direct sunlight can accelerate the degradation of materials, causing them to become brittle, discolored, or warped. It is advisable to store cake disposables in a cool, dry place, away from extreme temperatures and moisture. Additionally, keeping them in their original packaging can help protect them from external elements.

Time Frame

The expected lifespan of cake disposables varies depending on the type and quality of the product. In general, most cake disposables are designed to last for several months if stored correctly. However, it’s crucial to check the manufacturer’s guidelines on the packaging for specific information about the recommended shelf life. Using cake disposables beyond their suggested expiration date may compromise their integrity and safety.

Consider the Type of Cake

Certain types of cakes or desserts may have different effects on disposable materials. For example, cakes with high moisture content or creamy toppings may cause paper-based disposables to become soggy more quickly. It’s essential to factor in the specific characteristics of the cake you plan to serve when choosing disposable cakeware.

Environmental Impact

While the convenience of disposable cakeware is undeniable, it’s crucial to consider the environmental impact of these products. Opting for eco-friendly disposables made from sustainable materials can align with your commitment to reducing waste and promoting a greener lifestyle.

FAQs

How long can I store cake disposables?

The shelf life of cake disposables depends on factors like material and storage conditions. In general, they are designed to last several months, but it’s crucial to check the manufacturer’s guidelines for specific recommendations.

Can I use cake disposables after their expiration date?

Using cake disposables beyond their suggested expiration date is not recommended. The materials may degrade, compromising their integrity and safety. Always adhere to the manufacturer’s guidelines for optimal use.

Do different types of cakes affect the lifespan of disposables?

A3: Yes, the type of cake matters. Cakes with high moisture content or creamy toppings may impact paper-based disposables more quickly. Consider the characteristics of your cake when choosing disposable cakeware for optimal performance.

Final Thought

In conclusion, the longevity of cake disposables depends on various factors such as the material, storage conditions, and the specific type of cake being served. By choosing high-quality disposables, storing them properly, and being mindful of their limitations, you can ensure that your cake disposables last as long as possible. Additionally, considering the environmental impact of your choices can contribute to a more sustainable approach to hosting events and celebrations.

Learn How To Bake A Simple Cake For Beginners

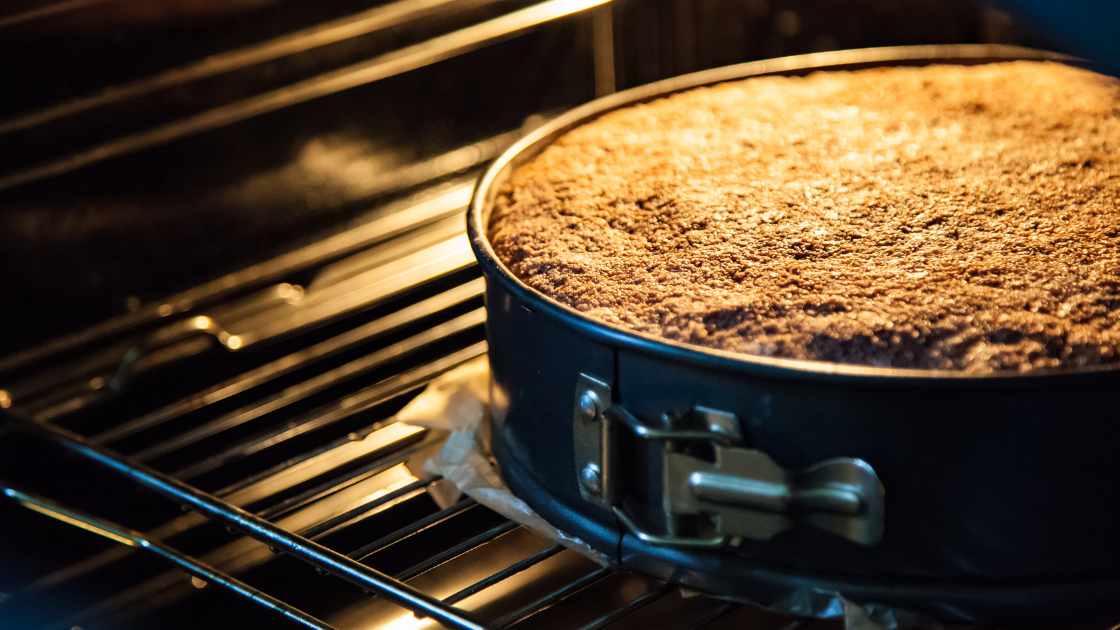
Baking a cake from scratch can be an immensely rewarding and enjoyable experience, especially for beginners eager to explore the world of baking. With a few basic ingredients and some simple steps, you can create a delicious homemade cake that will impress your friends and family. In this guide, we will take you through the step-by-step process of baking a simple cake, perfect for those just starting their baking journey.

A Beginner’s Guide to Crafting a Simple and Delicious Cake

Ingredients

  • 2 1/2 cups all-purpose flour
  • 2 1/2 teaspoons baking powder
  • 1/2 teaspoon salt
  • 1 cup unsalted butter, softened
  • 2 cups granulated sugar
  • 4 large eggs
  • 1 teaspoon vanilla extract
  • 1 cup whole milk

Equipment

  • Mixing bowls
  • Electric mixer or stand mixer
  • Cake pans
  • Parchment paper
  • Cooling rack

Step 1: Preheat the Oven

Preheat your oven to 350°F (175°C). This ensures that your cake bakes evenly and rises properly.

Step 2: Prepare the Cake Pans

Grease the cake pans with butter or cooking spray and line the bottoms with parchment paper. This prevents the cake from sticking to the pan and makes it easier to remove later.

Step 3: Mix the Dry Ingredients

In a medium-sized bowl, whisk together the flour, baking powder, and salt. This ensures that these dry ingredients are evenly distributed throughout the batter.

Step 4: Cream the Butter and Sugar

In a large mixing bowl, use an electric mixer or stand mixer to cream together the softened butter and granulated sugar until light and fluffy. This step helps incorporate air into the batter, creating a light and tender cake.

Step 5: Add Eggs and Vanilla

Add the eggs one at a time, beating well after each addition. Then, add the vanilla extract and mix until combined. The eggs contribute to the cake’s structure, while vanilla adds flavor.

Step 6: Alternate Adding Dry Ingredients and Milk

Gradually add the dry ingredients to the wet ingredients, mixing on low speed. Then, add the milk slowly, alternating with the dry ingredients. Begin and end with the dry ingredients. This step ensures a smooth and well-mixed batter.

Step 7: Pour Batter into Pans

Divide the batter evenly between the prepared cake pans. Use a spatula to spread the batter evenly.

Step 8: Bake

Place the pans in the preheated oven and bake for 25-30 minutes or until a toothpick inserted into the center comes out clean. Baking times may vary, so keep an eye on the cakes as they cook.

Step 9: Cool and Frost

Allow the cakes to cool in the pans for 10 minutes, then transfer them to a cooling rack to cool completely. Once cooled, you can frost the cake with your favorite frosting or enjoy it as is.

FAQs

What are the basic ingredients needed to bake a simple cake for beginners?

To bake a simple cake, you’ll need basic ingredients like 2 1/2 cups all-purpose flour, 2 1/2 teaspoons baking powder, 1/2 teaspoon salt, 1 cup unsalted butter, 2 cups granulated sugar, 4 large eggs, 1 teaspoon vanilla extract, and 1 cup whole milk. These staples form the foundation for a delicious homemade cake.

Do I need any special equipment for baking a simple cake as a beginner?

While you don’t need elaborate equipment, having a few essentials is helpful. Gather mixing bowls, an electric or stand mixer, cake pans, parchment paper, and a cooling rack. These tools will assist you in preparing and baking your cake, ensuring a smooth and enjoyable baking experience.

Can you provide a quick overview of the steps to bake a simple cake for beginners?

Certainly! Begin by preheating your oven to 350°F. Prepare your cake pans by greasing and lining them. In a bowl, whisk together 2 1/2 cups flour, 2 1/2 teaspoons baking powder, and 1/2 teaspoon salt. Cream 1 cup softened butter and 2 cups sugar, then add 4 eggs one at a time, followed by 1 teaspoon vanilla. Alternately add the dry ingredients and 1 cup of milk to the wet ingredients. Divide the batter into pans and bake for 25-30 minutes. Cool, frost if desired, and enjoy your homemade cake!

Final Thought

Baking a simple cake from scratch is a delightful experience that allows you to savor the fruits of your labor. With this step-by-step guide, even beginners can embark on their baking journey with confidence. So, gather your ingredients, preheat your oven, and let the aroma of freshly baked cake fill your kitchen! Happy baking!

Learn How To Made Vanilla Ice Cream

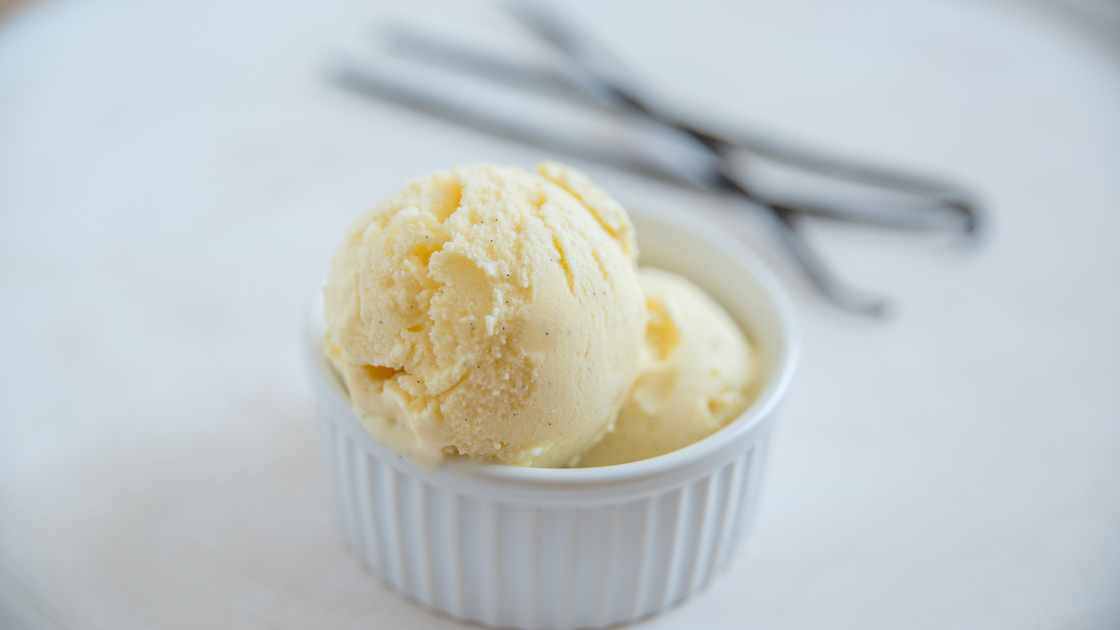
Few desserts evoke the universal joy that vanilla ice cream does. Its smooth, creamy texture and rich, sweet flavor make it a timeless treat loved by people of all ages. While store-bought options are readily available, there’s something truly special about making vanilla ice cream from scratch. In this guide, we will walk you through the simple yet rewarding process of creating your own batch of homemade vanilla ice cream.

A Delightful Journey: Crafting Homemade Vanilla Ice Cream

Ingredients:

Before diving into the process, gather the following ingredients:

  • 2 cups heavy cream
  • 1 cup whole milk
  • 3/4 cup granulated sugar
  • 1 tablespoon pure vanilla extract
  • A pinch of salt

Equipment:

  • Ice cream maker
  • Mixing bowls
  • Whisk
  • Measuring cups and spoons
  • Plastic or metal container with a lid for freezing

Procedure:

Prepare the Base:

Begin by combining the heavy cream, whole milk, and granulated sugar in a mixing bowl. Use a whisk to ensure the sugar dissolves completely. This mixture forms the base of your vanilla ice cream.

Add Flavor and Aroma:

Incorporate the pure vanilla extract into the base. Vanilla extract is the key to achieving that classic, aromatic vanilla flavor. Don’t be tempted to use artificial vanilla flavoring; the real deal makes a noticeable difference.

Season with a Pinch of Salt:

Enhance the overall flavor by adding a pinch of salt. This may seem counterintuitive in a sweet treat, but salt acts as a flavor enhancer, bringing out the richness of the vanilla.

Chill the Mixture:

Cover the bowl and refrigerate the mixture for at least 2-4 hours or, ideally, overnight. This chilling process allows the flavors to meld and ensures a smoother texture during the churning phase.

Churn the Ice Cream:

Transfer the chilled mixture to your ice cream maker and churn according to the manufacturer’s instructions. This typically takes about 20-30 minutes, resulting in a creamy consistency.

Transfer and Freeze:

Once churned, transfer the ice cream to a plastic or metal container with a tight-fitting lid. Smooth the surface with a spatula and place it in the freezer for at least 4 hours or until firm.

Serve and Enjoy:

Your homemade vanilla ice cream is now ready to be enjoyed! Scoop it into bowls or cones, or get creative with toppings and sauces.

Tips and Variations:

  • Experiment with different types of vanilla beans for a more nuanced flavor.
  • Swirl in chocolate chips, crushed cookies, or caramel for added texture.
  • Drizzle with homemade chocolate or fruit sauce for an extra touch of decadence.

How do I make vanilla ice cream without an ice cream maker?

Answer: Making vanilla ice cream without an ice cream maker is possible! After preparing the base mixture, pour it into a shallow dish and place it in the freezer. Every 30 minutes, stir vigorously with a fork to break up ice crystals. Repeat this process for about 3-4 hours until you achieve a creamy consistency.


Can I use vanilla bean instead of vanilla extract for a more intense flavor?

Answer: Absolutely! If you have vanilla beans on hand, scrape the seeds from one or two pods and add them to the base mixture. This will impart a richer, more complex vanilla flavor. Don’t discard the pods – you can steep them in the cream mixture before heating for an even stronger essence.


How can I ensure a smoother texture in my homemade vanilla ice cream?

Answer: Achieving a smooth texture is all about patience. Allow the base mixture to chill in the refrigerator for at least 2-4 hours, or preferably overnight. This not only enhances the flavor but also ensures that the mixture is adequately cold before churning. Patience during the freezing phase is key as well; let the ice cream set in the freezer for a minimum of 4 hours before serving for the best consistency

Final Thought

Crafting your own vanilla ice cream at home is not only a delightful culinary experience but also a rewarding one. With a few simple ingredients and the right equipment, you can enjoy a scoop of homemade goodness that surpasses many store-bought options. So, gather your ingredients, follow the steps, and savor the sweet satisfaction of creating your own batch of creamy, dreamy vanilla ice cream.

How To Design A Cake? A comprehensive guide

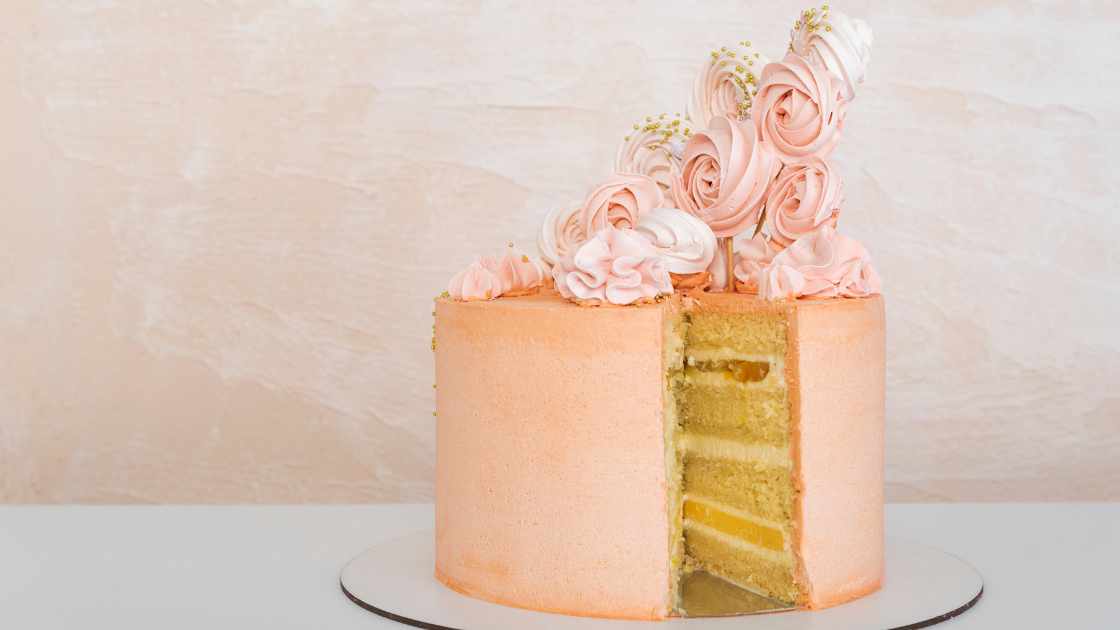
Designing a cake is more than just baking a delicious dessert; it’s an art form that allows you to unleash your creativity and impress your guests with a delightful centerpiece. Whether you’re a beginner or an experienced baker, mastering the art of cake design can be a rewarding and enjoyable experience. In this article, we will provide you with a comprehensive step-by-step guide on how to design a cake that not only tastes heavenly but also looks stunning.

Mastering the Art of Cake Design: A Step-by-Step Guide

 Choose the Right Cake Flavor and Recipe

The foundation of a well-designed cake starts with a mouthwatering flavor and a reliable recipe. Consider the preferences of your audience and choose a flavor that suits the occasion, such as chocolate, vanilla, lemon, or red velvet. Ensure you have a tried-and-tested recipe that guarantees a moist and flavorful cake.

Gather the Necessary Tools and Ingredients

Before you start designing your cake, gather all the tools and ingredients you’ll need. Some essential tools include cake pans, a rotating cake stand, offset spatulas, piping bags, and various decorating tips. As for ingredients, make sure you have enough flour, sugar, eggs, butter, baking powder, and other flavorings required for your chosen recipe.

Bake and Cool the Cake Layers

Follow your chosen cake recipe to bake the cake layers. Make sure to evenly distribute the batter in the cake pans and bake them according to the specified time and temperature. Once the cakes are baked, allow them to cool completely on wire racks. It’s crucial to work with completely cooled cakes to ensure that your decorations stay in place.

Level and Fill the Cake Layers

Level the cake layers using a sharp serrated knife or a cake leveler to create a flat surface. Apply a thin layer of frosting or filling between each layer to add flavor and moisture. Common fillings include buttercream, ganache, fruit preserves, or flavored whipped creams. Be generous but not excessive with the filling to maintain a balanced ratio between cake and filling.

Crumb Coat the Cake

Apply a crumb coat—a thin layer of frosting all over the cake—to seal in the crumbs. This initial layer acts as a base for the final coat of frosting and helps create a smooth surface. Use a thin layer of buttercream or ganache to cover the entire cake, ensuring an even layer.

Decorate with Frosting and Fondant

Once the crumb coat has set, you can start the fun part: decorating the cake! You can use buttercream frosting to pipe beautiful flowers, intricate designs, or smooth finishes on the cake. Alternatively, you can cover the cake with fondant, a pliable icing that allows you to create smooth and flawless surfaces. Fondant can be colored, shaped, and molded to bring your creative ideas to life.

Add Finishing Touches

Enhance your cake design by adding various finishing touches. You can use edible glitter, decorative sprinkles, fresh flowers, or chocolate ganache drips to add visual appeal. Experiment with different textures, colors, and shapes to create a cake that stands out and complements the occasion.

Practice and Experiment

Cake design is an art that improves with practice and experimentation. Don’t be afraid to try new techniques, colors, and designs. Watch online tutorials, attend baking classes, and participate in cake decorating forums to learn from others and expand your skills. With time and patience, you’ll gain confidence and expertise in designing stunning cakes.

FAQ’s

How do I choose the right cake design for a specific occasion?

Selecting the perfect cake design for a specific occasion involves considering the theme, the preferences of the person the cake is for, and the nature of the event. For example, for a birthday celebration, you might want to incorporate the birthday person’s favorite colors, hobbies, or interests into the design. For weddings, elegant and sophisticated designs are often preferred. Baby showers may involve playful and cute themes. Consider the event’s tone and the recipient’s personality to guide your choice. Pinterest, cake decorating books, and online tutorials can be valuable sources of inspiration.

What are some essential tools and techniques for cake design?

Several tools and techniques are fundamental to cake design.

Tools:

Cake Pans: Invest in a variety of sizes and shapes to create tiered or sculpted cakes.

Rotating Cake Stand: This makes it easier to frost and decorate the cake evenly.

Offset Spatulas: Ideal for smoothing frosting and applying even layers.

Piping Bags and Tips: Essential for creating intricate designs and borders with frosting.

Fondant Smoother: Helps achieve a polished look when working with fondant.

Edible Color Gels: Used to tint frosting and fondant in various colors.

Techniques:

Buttercream Piping: Learn different piping techniques to create flowers, borders, and intricate patterns.

Fondant Modelling: Master the art of shaping fondant into figures, flowers, and decorative elements.

Cake Stacking: For tiered cakes, learn how to properly stack and support layers to prevent collapsing.

Ganache Drip: Create smooth and glossy chocolate ganache drips for a professional finish.

Airbrushing: Utilize an airbrush kit to add gradients, shadows, and intricate designs to your cakes.

How can I ensure my cake design stays fresh and intact until serving?

Preserving your cake’s freshness and appearance until it’s time to serve is crucial. Here are some tips to achieve this:

Refrigeration: If your cake contains perishable fillings like custard or fresh fruit, refrigerate it until shortly before the event. Buttercream-frosted cakes can usually stay at room temperature for a few hours.

Proper Storage: Store the cake in a cool, dry place away from direct sunlight and strong odors.

Transportation: If you need to transport the cake, use a sturdy cake box and non-slip matting to prevent sliding. Drive carefully and avoid sudden stops or sharp turns.

Last-Minute Touch-ups: Carry extra frosting, fondant, or decorative elements for any last-minute touch-ups at the venue.

Serve at the Right Time: Ideally, assemble and decorate the cake as close to the serving time as possible to maintain its freshness and visual appeal.

By following these guidelines and practicing your skills, you can design cakes that not only look stunning but also taste delicious and stay fresh until they are enjoyed by your guests.

Final thought

Designing a cake is a delightful journey that allows you to express your creativity and passion for baking. By following these step-by-step guidelines, you can create a cake that not only tastes heavenly but also captivates the eyes. Remember, practice makes perfect, so keep experimenting and refining your skills. With dedication and a sprinkle of creativity, you’ll soon master the art of cake design and delight your friends and family with your beautifully crafted creations. Happy baking!