Transform Your Store-Bought Pesto with These Simple Techniques

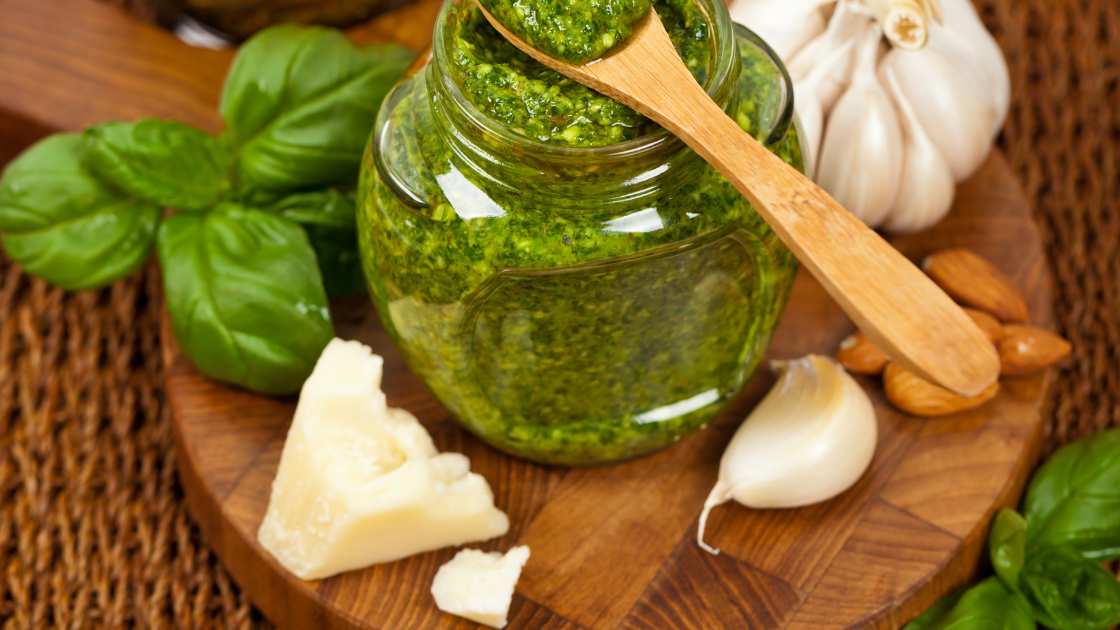
Pesto is a popular Italian sauce that is traditionally made with fresh basil, garlic, pine nuts, olive oil, and Parmesan cheese. While making pesto from scratch can be a labor-intensive process, many people opt for store-bought varieties for convenience. However, store-bought pesto can sometimes lack the rich and creamy texture of homemade pesto. Fortunately, there are a few simple techniques that you can use to transform your store-bought pesto into a luxurious and flavorful sauce.

Transform Your Store-Bought Pesto

Add cream or milk

One of the easiest ways to make store-bought pesto creamier is to add cream or milk. This will not only make the pesto creamier but also mellow out any sharp flavors. Start by adding a tablespoon or two of cream or milk to your pesto and mix well. You can adjust the amount based on your taste preferences.

Incorporate butter

Butter is another ingredient that can help make your pesto creamier. Simply melt a tablespoon or two of unsalted butter and stir it into your pesto. This will give your sauce a rich and velvety texture.

Toast nuts

Toasting nuts before adding them to your pesto can add depth and nuttiness to the sauce. Simply toast the nuts in a dry skillet over medium heat until they are golden brown and fragrant. Let them cool, then chop them finely and add them to your pesto.

Add more cheese

Adding more cheese to your store-bought pesto can help thicken the sauce and give it a richer flavor. Grate some additional Parmesan or Pecorino Romano cheese and stir it into your pesto until it reaches your desired consistency.

Blend with a food processor

If you want to take your pesto to the next level, consider blending it with a food processor or blender. This will help to break down the ingredients and create a smooth and creamy sauce. Simply add your pesto to the food processor or blender, along with any additional ingredients, and blend until smooth.

FAQ’s

How much cream or milk should I add to my store-bought pesto?

It depends on your personal taste preferences and the consistency of your pesto. Start by adding a tablespoon or two of cream or milk and mix well. You can always add more if you want a creamier sauce.

Can I use any type of nuts for my pesto?

Traditionally, pine nuts are used in pesto, but you can use any type of nuts that you like, such as walnuts, almonds, or pistachios. Toasting the nuts before adding them to your pesto will bring out their flavor.

Can I make these changes to any brand of store-bought pesto?

Yes, these techniques can be used with any brand of store-bought pesto. However, keep in mind that the flavors and consistency of different brands may vary, so you may need to adjust the amount of ingredients you add accordingly.

Conclusion

By following these simple techniques, you can easily transform your store-bought pesto into a luxurious and flavorful sauce that will elevate any dish. Whether you’re making pasta, spreading it on bread, or using it as a marinade, these tips will help you achieve a creamy and delicious pesto every time.

Room Temperature vs. Cold Cream Cheese: How it  Affects Your Baking and Recipes

When it comes to baking with cream cheese, the temperature at which you use it can make a big difference in the final outcome of your recipe. Using cream cheese that is too cold or too warm can result in a dense, lumpy, or even grainy texture that can ruin the taste and presentation of your dish. In this article, we’ll explore the differences between room temperature and cold cream cheese and how they affect your baking and recipes.

Room Temperature vs. Cold Cream Cheese

What is Room Temperature Cream Cheese?

Room temperature cream cheese is soft, spreadable, and at a consistent temperature of around 68 to 72 degrees Fahrenheit. It is best used for recipes that require blending, mixing, or beating. This temperature allows the cream cheese to easily combine with other ingredients and creates a smooth and creamy texture.

What is Cold Cream Cheese?

Cold cream cheese is straight from the refrigerator, and its temperature is around 40 degrees Fahrenheit. It is harder and more challenging to blend and mix with other ingredients compared to room temperature cream cheese. Using cold cream cheese can result in a lumpy or grainy texture that is not desirable in most baking recipes.

How Does Room Temperature vs. Cold Cream Cheese Affect Your Recipes?

The texture and consistency of cream cheese can drastically affect your baked goods and other recipes. When cream cheese is too cold, it will not blend or mix evenly with other ingredients. This can lead to clumps and lumps, which will affect the texture of your baked goods or frosting.

On the other hand, when cream cheese is at room temperature, it blends more easily and creates a smooth and consistent texture. This is essential when making cheesecake, frosting, or any recipe that requires a creamy, smooth texture. Room temperature cream cheese also produces a lighter and fluffier texture when beaten or mixed, which makes it ideal for recipes that call for it.

Tips for Softening Cream Cheese

If you forget to take your cream cheese out of the fridge ahead of time, there are still ways to soften it quickly. Here are a few tips:

Remove the cream cheese from the packaging and microwave it for 15-20 seconds. Be careful not to overheat it as it can melt and ruin your recipe.

Cut the cream cheese into small cubes and leave it on the counter for about 30 minutes. This will help it reach room temperature faster.

Place the cream cheese in a sealed plastic bag and immerse it in a bowl of warm water for 10-15 minutes. This method is especially useful when you need to soften a larger amount of cream cheese.

FAQ,s

What happens if I use cold cream cheese instead of room temperature cream cheese in my recipe?

Using cold cream cheese in your recipe can result in a lumpy or grainy texture that is not desirable in most baking recipes. Cold cream cheese is harder and more challenging to blend and mix with other ingredients compared to room temperature cream cheese. This can lead to clumps and lumps, which will affect the texture of your baked goods or frosting.

How long does it take for cream cheese to reach room temperature?

It typically takes about 30 to 60 minutes for cream cheese to reach room temperature, depending on the temperature of your kitchen. To speed up the process, you can cut the cream cheese into small cubes and leave it on the counter for about 30 minutes or place it in a sealed plastic bag and immerse it in a bowl of warm water for 10-15 minutes.

Can I use a microwave to soften cream cheese quickly?

Yes, you can soften cream cheese quickly using a microwave. Remove the cream cheese from the packaging and microwave it for 15-20 seconds. Be careful not to overheat it as it can melt and ruin your recipe. It’s best to microwave in short increments and check the consistency after each interval.

Conclusion

The temperature of cream cheese can significantly affect your recipes, especially when it comes to baking. Using room temperature cream cheese creates a smooth, consistent texture, which is essential in many recipes. Cold cream cheese can lead to lumps and grains, making it difficult to blend and mix. When possible, allow cream cheese to reach room temperature before using it in your recipes. If you forget, use one of the tips above to soften it quickly.

Satisfy Your Cravings: How to Make Biscuits without Baking Powder or Baking Soda

Biscuits are a beloved comfort food that can be enjoyed for breakfast, lunch, or dinner. However, if you don’t have baking powder or baking soda on hand, you may be wondering if it’s still possible to make delicious biscuits. The good news is that you can make biscuits without these leavening agents, and they can be just as tasty and fluffy as their traditional counterparts. In this article, we’ll show you how to make biscuits without baking powder or baking soda.

Make Biscuits without Baking Powder or Baking Soda

Ingredients

2 cups of all-purpose flour

1 tablespoon of granulated sugar

1 tablespoon of baking powder

1/2 teaspoon of salt

1/2 cup of unsalted butter, chilled and cubed

3/4 cup of milk

Instructions

Preheat your oven to 425°F (218°C) and prepare a baking sheet by lining it with parchment paper.

In a large mixing bowl, whisk together the flour, sugar, baking powder, and salt.

Add the cubed butter to the dry ingredients and use a pastry cutter or your hands to work the butter into the flour mixture until it resembles coarse crumbs.

Gradually add the milk to the mixture and stir until just combined. The dough should be moist but not overly sticky.

Turn the dough out onto a floured surface and knead it gently for about 1 minute. Be careful not to overwork the dough, as this can result in tough biscuits.

Flatten the dough to a thickness of about 1/2 inch and use a biscuit cutter or a round cookie cutter to cut out the biscuits. Place the biscuits on the prepared baking sheet, leaving about 2 inches of space between each one.

Bake the biscuits for 12-15 minutes or until they are golden brown on top. Remove them from the oven and allow them to cool for a few minutes before serving.

Tips and Variations

To add extra flavor to your biscuits, you can mix in shredded cheese, chopped herbs, or cooked bacon bits.

If you don’t have a biscuit cutter or a round cookie cutter, you can use the rim of a drinking glass to cut out the biscuits.

For a sweeter biscuit, you can increase the amount of sugar in the recipe to 2-3 tablespoons.

You can also brush the tops of the biscuits with melted butter or honey before baking for added flavor and shine.

FAQ’s

Can I use self-rising flour instead of all-purpose flour for making biscuits without baking powder or soda?

No, you should not use self-rising flour for this recipe as it already contains baking powder and salt. Using self-rising flour will result in over-leavened and overly salty biscuits. Stick to all-purpose flour and use the ingredients and measurements as listed in the recipe.

My biscuits turned out dry and tough. What did I do wrong?

It’s possible that you overworked the dough while kneading it or flattened the dough too much before cutting out the biscuits. Overworking the dough develops gluten, which can result in tough biscuits. Additionally, flattening the dough too much can cause the biscuits to be thin and dry. Next time, handle the dough gently and avoid over-kneading it. Also, make sure to keep the dough at a thickness of at least 1/2 inch when cutting out the biscuits.

Can I make these biscuits ahead of time and reheat them later?

Yes, you can make these biscuits ahead of time and reheat them in the oven or microwave before serving. To reheat in the oven, place the biscuits on a baking sheet and warm them in a preheated oven at 350°F for about 5-7 minutes or until heated through. To reheat in the microwave, wrap the biscuits in a damp paper towel and microwave them for about 10-15 seconds or until warm. However, keep in mind that freshly baked biscuits are always the best, and reheating them may affect their texture and flavor.

Conclusion

Making biscuits without baking powder or baking soda is not only possible but also easy and delicious. With just a few simple ingredients and some basic kitchen tools, you can whip up a batch of fluffy and satisfying biscuits that will satisfy your cravings any time of day. Give this recipe a try and enjoy the warm and buttery goodness of homemade biscuits in no time.

Is Almond Milk Vegan?

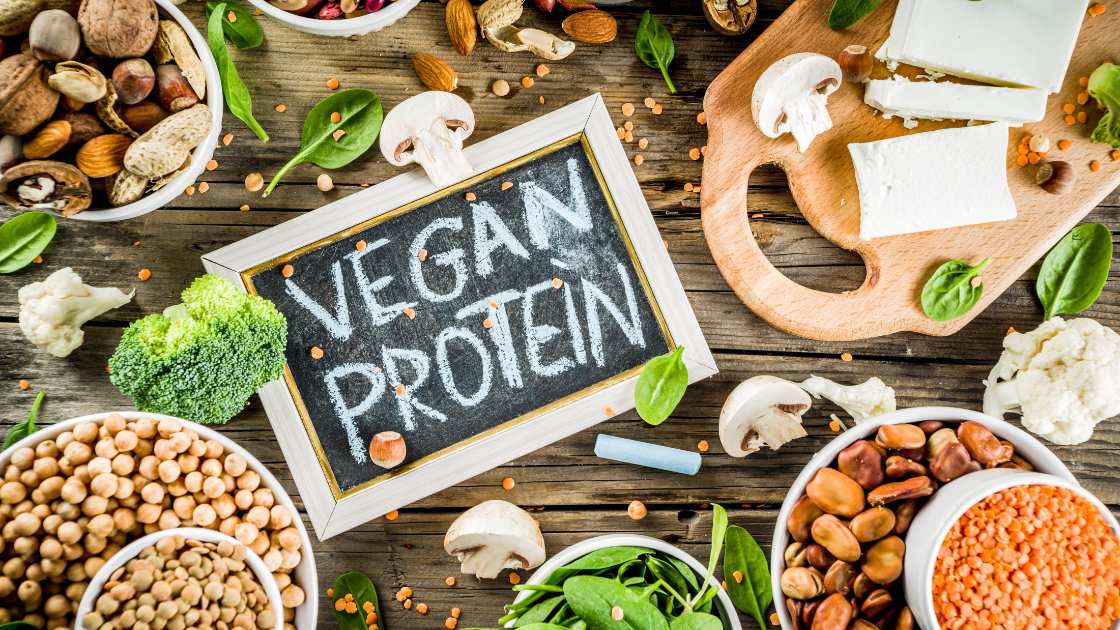
Almond milk has become a popular plant-based milk alternative in recent years, particularly among those who follow a vegan lifestyle. However, some people may wonder whether almond milk is actually vegan or not. In this article, we will explore the question of whether almond milk is a vegan-friendly option.

What is Almond Milk?

Almond milk is a plant-based milk alternative made by blending almonds and water. The resulting mixture is then strained to remove any solid particles, resulting in a smooth and creamy liquid that is similar in texture to cow’s milk. Almond milk is often fortified with additional vitamins and minerals, such as calcium, vitamin D, and vitamin B12.

Is Almond Milk Vegan?

Yes, almond milk is considered to be vegan. Since it is made entirely from plant-based ingredients, almond milk does not contain any animal products or byproducts. As such, it is a suitable alternative for those who follow a vegan diet or lifestyle.

Benefits of Almond Milk for Vegans

Almond milk offers a range of benefits for vegans, including:

Nutrient-rich: Almond milk is often fortified with additional vitamins and minerals, such as calcium, vitamin D, and vitamin B12. This can help vegans ensure that they are meeting their daily nutrient requirements.

Low in calories: Almond milk is generally lower in calories than cow’s milk, making it a good option for those who are trying to maintain a healthy weight.

Versatile: Almond milk can be used in a variety of ways, such as in coffee, smoothies, and baking. This makes it a versatile ingredient that can be used in a range of vegan recipes.

Environmentally friendly: Producing almond milk requires less water and produces fewer greenhouse gas emissions than producing cow’s milk. As such, consuming almond milk can be seen as a more environmentally friendly choice.

FAQ’s

Is almond milk vegan?

Yes, almond milk is considered to be vegan. Since it is made entirely from plant-based ingredients, almond milk does not contain any animal products or byproducts.

What are the benefits of almond milk for vegans?

Almond milk offers a range of benefits for vegans, including:

Nutrient-rich: Almond milk is often fortified with additional vitamins and minerals, such as calcium, vitamin D, and vitamin B12. This can help vegans ensure that they are meeting their daily nutrient requirements.

Low in calories: Almond milk is generally lower in calories than cow’s milk, making it a good option for those who are trying to maintain a healthy weight.

Versatile: Almond milk can be used in a variety of ways, such as in coffee, smoothies, and baking. This makes it a versatile ingredient that can be used in a range of vegan recipes.

Are there any potential drawbacks to consuming almond milk as a vegan?

While almond milk can be a great option for vegans, it is important to note that some store-bought varieties may contain additives such as sweeteners and thickeners. Additionally, almond milk may not be suitable for those with nut allergies. It is always important to read the ingredient list and check with a healthcare provider if you have any concerns about consuming almond milk.

Conclusion

In conclusion, almond milk is a vegan-friendly milk alternative that can provide a range of benefits for those who follow a vegan diet or lifestyle. Not only is it nutrient-rich and versatile, but it is also environmentally friendly and can be used in a range of vegan recipes. So, if you are looking for a plant-based milk alternative, almond milk may be a great option for you.

Quick and Easy Air Fryer Breakfast Banana Split Recipe to Try Today

Looking for a delicious and healthy breakfast idea? Look no further than the air fryer breakfast banana split! This quick and easy recipe is a twist on the classic dessert, and it’s the perfect way to start your day on a sweet note. With just a few simple ingredients and an air fryer, you can whip up this tasty dish in no time. In this article, we’ll walk you through the steps of making an air fryer breakfast banana split and provide some helpful tips to ensure it turns out perfectly.

Ingredients

  • 1 ripe banana
  • 2 tablespoons of granola
  • 2 tablespoons of Greek yogurt
  • 2 tablespoons of fresh berries (strawberries, blueberries, or raspberries)
  • 1 tablespoon of honey
  • 1 tablespoon of chopped nuts (optional)

Instructions

  1. Preheat your air fryer to 350°F.
  2. Cut the banana in half lengthwise, and then cut each half in half again.
  3. Place the banana quarters in the air fryer basket, and cook for 4-5 minutes until they are soft and lightly browned.
  4. While the bananas are cooking, mix the granola, Greek yogurt, and honey in a small bowl.
  5. Once the bananas are done, place them in a serving dish, and top them with the granola mixture, fresh berries, and chopped nuts (if using).
  6. Drizzle with additional honey, if desired.
  7. Serve and enjoy!

Helpful Tips

  • Make sure to use a ripe banana for the best flavor and texture.
  • If you don’t have granola on hand, you can substitute it with rolled oats or crushed cereal.
  • Feel free to use any variety of fresh berries that you like, or even mix and match.
  • If you’re looking for a vegan option, you can substitute Greek yogurt with a non-dairy alternative, such as coconut or almond yogurt.
  • Experiment with different toppings, such as shredded coconut, chocolate chips, or sliced almonds.

FAQ

How do you make banana splits?

To make a traditional banana split, you’ll need a ripe banana, three scoops of ice cream (typically vanilla, chocolate, and strawberry), and a variety of toppings, such as whipped cream, chocolate syrup, caramel sauce, chopped nuts, and maraschino cherries. To assemble the banana split, slice the banana in half lengthwise and place the halves in a dish. Add the scoops of ice cream on top of the banana, and then drizzle with your desired toppings. Enjoy with a spoon and dig in!

What mixture is banana split?

The mixture of a banana split traditionally consists of vanilla, chocolate, and strawberry ice cream, along with a variety of toppings such as whipped cream, chocolate syrup, caramel sauce, chopped nuts, and maraschino cherries. However, the mixture can vary depending on personal preferences and the region or restaurant where it is being served. Some variations may include different flavors of ice cream or alternative toppings.

Conclusion

The air fryer breakfast banana split is a tasty and healthy way to start your day. With just a few simple ingredients and an air fryer, you can create a delicious and satisfying breakfast that will leave you feeling energized and ready to take on the day. Give this recipe a try today, and customize it to your liking for a breakfast that’s perfect for you.

The Surprising Reason Why There is No Protein in Mayo!

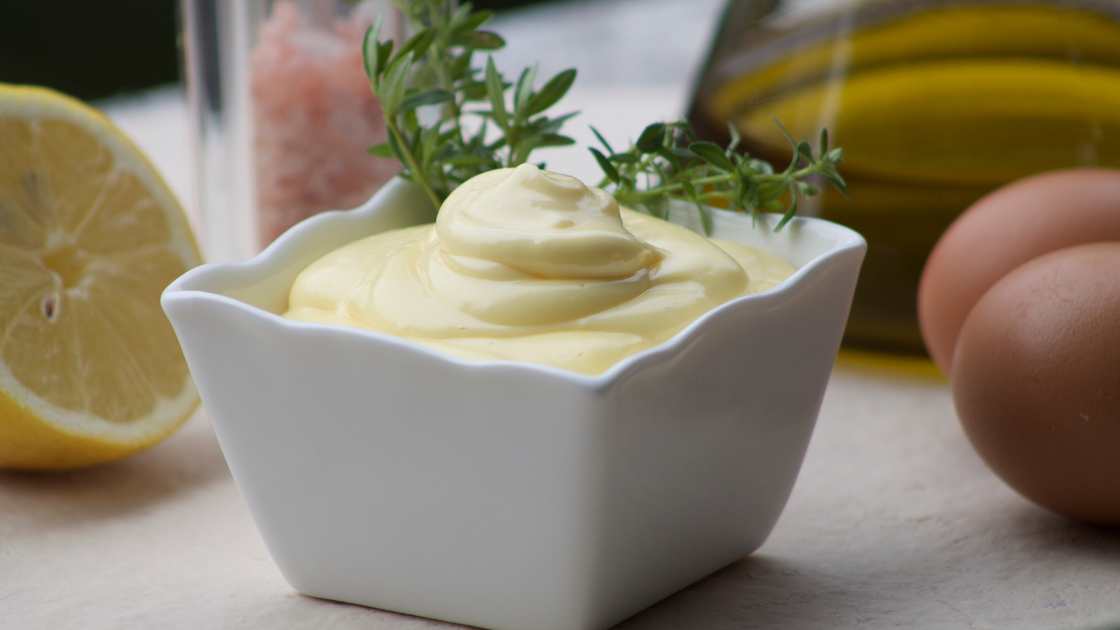
Mayonnaise is a recipe that typically contains eggs, milk, and bread crumbs but however, there is no protein in mayo. This makes it unsuitable for most applications. The lack of protein in mayonnaise is a common topic of debate, with many people believing that it’s the result of over-processing or not using the right type of protein. This article will explore the reasons why mayonnaise might be lacking in protein.

What is mayonnaise?

Mayonnaise, often known as “mayo,” is a thick, cold, creamy sauce or dressing. It consists of oil, egg yolk, and an acid, either vinegar or lemon juice, and is used on sandwiches, French fries, pizza, burgers, and salads. It is a popular condiment in the United States and elsewhere. There are many different forms of mayonnaise, but white mayonnaise is the most common.

Does Mayonnaise have protein?

The lack of protein in mayonnaise is a common issue that people face. Many people believe that it is because the food isn’t cooked well, but this is not the only reason. There are many other reasons why protein is not found in mayonnaise.

Mayonnaise is a sauce made from eggs, oil, vinegar, and herbs. It is popular in salads and as an appetizer. Some people believe that mayonnaise has protein because it contains egg whites and egg yolks. However, this claim is not true for all mayonnaises.

A quart of mayonnaise has only 64 one tablespoon servings, each contains only 1/16 of a large egg yolk. This means that each serving has only 0.17 grams of protein, making it near to zero.

Some mayonnaises contain up to 2.1 grams of protein per cup, which is quite low when compared to other protein sources.

Mayonnaise is known to have a significant amount of saturated fat and cholesterol, both of which are known to raise the risk of cardiovascular disease. Mayonnaise only has about 0.1 to 0.3 grams of fat per tablespoon, and you shouldn’t consume more than three tablespoons each day.

Is mayo carbs or protein?

There are many keto-friendly mayonnaise recipes that you can make with high-fat, low protein, and zero carbohydrates. One of the best mayonnaise recipes is made with mayonnaise as the base. This is because it contains high fat, low protein, and zero carbohydrates. Plus, it has a great flavor that will make your keto diet easier to follow.

Benefits of including protein in your diet

Protein is an essential nutrient for humans. It helps to build muscle, teeth, blood clotting factors and other important proteins. In addition, protein can help you feel fuller sooner after eating and promote weight loss. This fact sheet provides some of the best benefits of including protein in your diet.

Is it necessary to include protein in every meal?

A growing body of scientific evidence suggests that a minimum of 20 grams of protein is necessary for optimal health and well-being. However, many people do not consume enough protein in their diets.

A study published in the Journal of Nutrition found that individuals who consumed the most protein had lower weight and blood pressure levels than those who didn’t consume any protein at all.

Some researchers believe that including a minimum of 20 grams of protein per meal may be enough for most people.

How do you determine if you need more or less protein in your mayonnaise?

It largely depends on your personal preferences and lifestyle. However, a few general tips that may help you determine whether or not you need more or less protein in your mayonnaise:

To get the most protein out of your mayonnaise, start by using quality proteins such as eggs, chicken, or turkey. This will help to boost the nutrient content and boost the flavor. Additionally, use low-fat or light-fat versions of all of your ingredients so that they are equally effective in providing all of the essential amino acids your body needs. Lastly, make sure to adjust the amount of oil you use to taste preference.

Diet Tip: Is yoplait yogurt healthy for you? The Pros and Cons of Including it in Your Diet

What Does Mayo Do for You?

Mayonnaise, one of the most common salad dressings in the world, has many benefits for those looking to improve heart health and blood clotting. The key nutrients that make mayonnaise beneficial are vitamin E and vitamin K.

Vitamin E is a powerful antioxidant that helps protect cells from damage. Vitamin K is an important hormone that helps the body form clotting proteins. These two nutrients together help improve heart health, optimize blood clotting, and reduce the risk of chronic diseases like stroke and heart disease.

In final words

There is reason why Mayo does not have protein in it. However, there are many other recipes that include protein, so if you’re looking for a good source of this type of food, check out some of your favorite restaurants or stores.

How to flip an omelette like a Pro!

Omelettes are one of the most commonly eaten breakfast items in the world. Flipping an omelette is a quick and easy way to get some breakfast on the table. It’s also one of the most fun things you can do with a pan, so make sure to give it a try! Flipping an omelette is a quick and easy way to create a delicious breakfast. All you need is a skillet and some eggs. To flip an omelette, start by frying the egg on one side until it is set. Then flip the omelette over and cook the other side until it is set as well. Once both sides are set, slide the omelette onto a plate and enjoy! Flipping an omelette is a quick and easy way to make a breakfast that’s delicious and nutritious. Like many things in life, flipping an omelette can be done in a few different ways, so it’s important to find the one that works best for you.

How do you flip an omelette without breaking it?

If you’re looking to make a better omelette, there are a few things you can do to avoid breaking it. First, make sure that the eggs are cooked through before flipping them. Second, use a non-stick pan and cook the eggs slowly over low heat so that they don’t scramble. Finally, be careful not to over-flip or break the omelette.

There are a few tricks to flipping an omelette without breaking it. Some people use a fork, others use their hands. Here are some tips:

– Use a Fork or Your Hands to Flip an Omelette

If you’re using a fork or your hands, keep in mind that you want the eggs to be cooked evenly on both sides before slicing into them. You can also use a spatula to help flip them if needed. Try not to move too much after the egg is cooked (this will prevent it from sticking to the skillet).

– Use an Electric Skillet for Flipping Omelettes

If you have an electric skillet, this is a great option because it doesn’t need heat from the oven or stovetop.

How to Flip an omelette

Flipping an omelette is a simple process that anyone can learn. There are a few key steps that need to be followed in order to make this process go smoothly. First, heat a skillet over medium-high heat until it is hot. Then, add 1/2 cup of oil to the skillet and swirl it around to coat the bottom. When the oil is hot, add one or two eggs and cook them until they are set. You can make them at home by following these simple steps: 1) heat some oil in a skillet over medium heat, and add an omelette pan or waffle maker. 2) Add eggs to the hot oil, and stir to coat. 3) Cook until the eggs are set, about 8 minutes. 4) Remove from the heat, and let cool for a few minutes before flipping.

Do you flip an omelette or just fold it?

It seems like a lot of people are confused about this popular breakfast choice. Do you have to do it the traditional way, or can you do it more creatively.There are many different ways to make an omelette, but one way is to simply fold it. This way, the eggs are not folded in half and can be handled more easily.

How do restaurants make omelettes so fluffy?

Omelettes can be made in a number of ways, but one of the most common is to use eggs. The omelette is created by folding an egg into a wavy shape and then rolling it into a knot. The rolling action creates a fluffy texture that is perfect for eating. By adding some herbs or cheese to the batter, restaurants can create different flavors and textures that are sure to please their customers. One way restaurants make omelettes so fluffy is by using a non-stick skillet to cook the eggs, then adding melted butter and salt. Other ingredients used in omelette making include flour, milk, and butter.

Final Thoughts

In conclusion, flipping an omelette can be a fun and easy way to get your morning started. You can make a delicious and nutritious omelette that will satisfy your hunger and keep you going all morning. Flipping an omelette is a simple and easy way to increase your breakfast options. Flipping an omelette is a easy and quick way to add some extra flavor and texture to your breakfast. With a little practice, you’ll be able to do it yourself with ease.

More Tips: How long is lasagna good for

How to Make Tepid Water?

There are a few things you can do to generate tepid water if you’re thirsty but don’t have access to hot water. You may use a hotter water bottle or boil water on the stove. If you need to drink but don’t want to become too heated, you can wash your face, hands, and lips with cool water.

What is a tepid water?

Tepid water is water that is neither hot nor cold, but instead falls somewhere in the between. It is usually between 60°F and 100°F (16°C and 38°C). Tepid water is suitable for drinking, dishwashing, and other household duties.

Is tepid water lukewarm?

Is the water in your faucet lukewarm? Many individuals are unaware that tap water may be heated. Tepid water is tepid in temperature, meaning it is neither hot nor cold to the touch. This water is good for drinking, bathing, and brushing your teeth, but not for cooking or brewing tea.

Tepid water is between the chilly and warm temperature ranges. The temperature is often approximately 68 degrees Fahrenheit, which is similar to room temperature. Some individuals enjoy tepid water, while others find it too mild.

Choose one of the other two settings if you want a hot bath or a chilly drink. The temperature of hot water is 96 degrees Fahrenheit, while the boiling point is 212 degrees Fahrenheit.

What is difference between lukewarm and tepid?

The terms are interchangeable. There is a significant variation in temperature between lukewarm and tepid water. Lukewarm water is close to body temperature, whereas tepid water is somewhat cooler than body temperature. In general, you want your water to be around 68 degrees Fahrenheit for maximum comfort.

Is drinking tepid water good for you?

Drinking warm water is nice, but is it healthy for you? Dr. Mercola and other health experts say lukewarm water is better than hot or cold. Here’s what to know about this physiological quirk:

Tepid water, just below body temperature, helps maintain skin healthy. When we overheat, we sweat to cool off. Sweat includes chemicals and germs that can cause illness, so keeping your skin cold makes you less unwell. Also, tepid water helps reduce headaches and weariness by flushing toxins from the system.

How to Make Tepid Water

Making tepid water is a quick and easy method to remain cool during the hot summer months. Take the following steps:

  1. Fill a thermos with cold water and freeze it for at least two hours.
  2. Pour the cold water into a saucepan or dish after removing the ice from the thermos.
  3. Slowly pour in hot water until the temperature reaches your preferred degree of comfort.
  4. Gently stir to combine, then drink immediately.

Can drinking hot water reduce fever?

Drinking hot water to lower fever is controversial, however there is some evidence that it can be useful. Hot water may assist to reduce the core temperature of the body, making symptoms more bearable.

It is also supposed to aid in the removal of microorganisms as well as the relief of pain and inflammation. There are a few considerations to follow while using hot water to reduce fever, such as avoiding excessive heat if you have a medical condition or exercising caution if you are pregnant or nursing.

Can we drink lukewarm water whole day?

If you have a stuffy nose and congestion, drinking lukewarm water throughout the day might help ease both symptoms. Drinking lukewarm water aids in the opening of your airways and the removal of congestion. It also helps to relieve nasal congestion by warming up your sinuses. If you find yourself frequently having to drink lukewarm water, consider the following steps:

  1. Fill a small drinking glass halfway with room temperature water.
  2. Sip the water slowly over several minutes, making sure to keep hydrated throughout the day.
  3. Drink additional lukewarm water if you feel congested or have a cold until your symptoms go away for good.

Can we drink hot water with honey?

Under no circumstances can honey be warmed, cooked, or heated. It becomes heated and poisonous when exposed to hot water.

There are, however, a few exceptions to this rule:

If the honey is diluted, you can consume it with hot water. For example, you can consume one spoonful of honey in eight glasses of cold water without any difficulties. In fact, diluting honey makes it more acidic, which may aid in the killing of germs and fungi.

It’s also worth noting that some individuals feel that drinking diluted honey is good for your general health. Some people swear by the health advantages of honey in any form, including diluted hot water. Others say that, while drinking diluted honey may have some advantages, these claims cannot be validated and are hence untested.

Read More: Salt on popcorn: How to Get Salt to Stick to Popcorn

Does hot water damage kidneys?

The question of whether hot water might harm the kidneys is currently being debated. However, there is data that suggests that prolonged exposure to hot water can be detrimental.

Hot water can induce renal irritation and inflammation, which can lead to kidney failure. Furthermore, heat can make the kidneys work harder and potentially lead them to malfunction. If you’re concerned about hot water harming your kidneys, limit how much you use it and take regular breaks to drink something cool.

In Final Word

It is critical to remember that just because the water is warm does not imply it is safe to drink. Always check the temperature of the water before drinking it, and if you are doubtful, do not drink it. Please visit your doctor if you are having any health issues or have any other queries.

Interesting facts: How long can eggs sit out?

How long can eggs sit out? To know the answer read the article.

When it comes to eggs, there are a lot of benefits and drawbacks to leaving them out of the fridge. Some people swear by the eggs they get in the fridge, while others find that they don’t cook as well or are more vulnerable to freezer burn. Ultimately, it comes down to what you’re comfortable with.

How long can eggs sit out?

According to the Centers for Disease Control and Prevention (CDC), eggs should not be left at room temperature for more than 2 hours. The hot environment can cause the growth of bacteria that can cause food poisoning.

The consequences of leaving eggs out of the fridge

consequences of leaving eggs out of the fridge

The consequences of leaving eggs out of the fridge are many and varied. In some cases, the eggs may become warm and develop a bad odor. In other cases, the eggs may be ruined and need to be properly cleaned. The most important thing is to keep your eggs cold so they will stay fresh.

Are eggs still good if left out for 24 hours?

Eggs are not safe to eat if they have been left out overnight. The USDA has determined that this is the case for most eggs. If you have an egg coming in from the grocery store, it is best to refrigerate it and avoid eating it.

Why do farm fresh eggs not have to be refrigerated?

Eggs, which lack a cuticle, should be stored in the refrigerator to prevent the formation of germs. On the other hand, eggs that haven’t been broken through their layers of protection are more resistant to internal salmonella infection and are not required to be refrigerated unless they’ve been exposed to extreme temperatures.

Read More: How to make gansito? Gansito recipe

The bottom line

If you want to keep your eggs fresh, it’s important to store them in a cool, dark place. Once the eggs are ready to be eaten, they will need to be refrigerated or frozen.

Hopefully, the article on how long can eggs sit out was helpful for you. Thanks.

Chocolate french toast recipe for all occasions

At Easter, we cannot miss the famous torrijas on our table and to enjoy a delicious variant, we show you this simple and delicious recipe for chocolate torrijas. The recipe is very similar to that of common torrijas, which this time we are going to give it a special touch by adding the chocolate (black, milk or white, whichever you prefer) and making them even more tasty and sweet.