How to Make Whipping Cream

Whipping cream is a versatile ingredient used in a wide range of culinary creations, from topping desserts to enriching sauces and soups. Making your own whipping cream at home is simple and allows you to control the quality and flavor. In this article, we will guide you through the steps to make homemade whipping cream that is rich, creamy, and perfect for any dish.

There are 4 Steps to Make Homemade Whipping Cream

Ingredients

Before you begin, gather the following ingredients:

Heavy Cream:

You will need at least 1 cup of heavy cream for a small batch of whipping cream. Ensure that the cream has a fat content of at least 36%, as this is crucial for achieving the desired consistency.

Sweetener (Optional): 

Depending on your preference, you can add a sweetener like powdered sugar or confectioners’ sugar to sweeten your whipping cream. This step is optional, and you can adjust the sweetness to your liking.

Equipment

To make whipping cream, you will need the following equipment:

A Mixing Bowl: 

Choose a clean, chilled mixing bowl made of metal or glass. A cold bowl helps whip the cream faster.

Whisk or Electric Mixer: 

You can use a hand whisk or an electric mixer with a whisk attachment for quicker and more efficient results.

Make Whipping Cream

Now, let’s dive into the steps to make whipping cream:

Chill Your Equipment

Place your mixing bowl and whisk or mixer attachments in the refrigerator for about 15-30 minutes before you start. This ensures that everything is cold, which is essential for achieving a stable whipped cream.

Pour the Heavy Cream

Pour the desired amount of cold heavy cream into your chilled mixing bowl. If you’re using a sweetener, you can add it at this stage. Start with about 2 tablespoons of powdered sugar for 1 cup of heavy cream and adjust to taste.

Whip the Cream

Using your whisk or electric mixer, begin whipping the cream. Start at low speed and gradually increase it as the cream thickens. Be patient; it may take a few minutes to see significant changes in texture.

Check for Stiff Peaks

Continue whipping until the cream reaches the desired consistency. To check for stiff peaks, lift the whisk or beaters out of the cream; if the cream forms peaks that hold their shape, it’s ready.

Serve or Store

Once your whipping cream is ready, you can use it immediately as a delicious topping for pies, cakes, fruits, or any dessert of your choice. If you have leftovers, store them in an airtight container in the refrigerator for up to 2-3 days.

Tips and Variations

  • You can customize your whipping cream by adding flavorings such as vanilla extract, cocoa powder, or citrus zest for a unique twist.
  • For a dairy-free option, substitute heavy cream with coconut cream or another plant-based alternative.
  • Avoid overwhipping the cream, as it can turn into butter. If you accidentally overwhip it, you can incorporate a little more unwhipped cream to rescue the texture.

FAQs

Can I use regular milk instead of heavy cream to make whipping cream?

No, you cannot substitute regular milk for heavy cream when making whipping cream. The key to whipping cream successfully is its high fat content. Heavy cream contains at least 36% fat, which allows it to trap air and create a stable whipped texture. Regular milk typically has a fat content of around 3-4%, which is insufficient for whipping. Attempting to whip milk will not yield the desired results and may result in a thin, runny consistency.

Can I use a non-dairy milk alternative to make whipping cream for a lactose-free option?

Yes, you can use non-dairy milk alternatives to make lactose-free whipping cream. Coconut cream and almond milk are popular choices for creating dairy-free whipping cream. Be sure to select a non-dairy milk that has a high fat content to mimic the richness of heavy cream. Coconut cream, in particular, is a suitable option due to its natural creaminess. Follow the same process as with heavy cream, and you can enjoy a dairy-free whipping cream that works well as a topping or ingredient in various recipes.

What can I do if my whipped cream turns grainy or curdled?

If your whipped cream turns grainy or curdled, it has likely been overwhipped. To salvage it, follow these steps:

Stop whipping immediately: 

Turn off the mixer or put down the whisk as soon as you notice the grainy texture.

Add more unwhipped cream: 

Gently fold in a small amount of unwhipped heavy cream into the overwhipped cream. This should help to smooth out the texture.

Mix briefly: 

Use your mixer or whisk to briefly mix the cream again, but be cautious not to overwhip it further. You want to combine the unwhipped cream with the overwhipped cream to achieve a smoother consistency.

Taste and adjust: 

Taste the whipped cream and adjust the sweetness if necessary by adding more sugar or flavorings.

Conclusion

Making homemade whipping cream is a straightforward process that elevates the taste of your desserts and culinary creations. With just a few simple steps and the right ingredients, you can enjoy creamy, dreamy whipped cream that’s perfect for any occasion. Whether you choose to sweeten it or customize the flavor, homemade whipping cream adds a delightful touch to your favorite dishes.

How to Melt Sugar: Sweet Secrets Unveiled

Melted sugar, often referred to as caramel, is the magical ingredient that adds a delightful sweetness and a touch of sophistication to countless culinary creations. Whether you’re crafting a decadent dessert, making a glossy sauce, or creating a beautiful sugar decoration, knowing how to melt sugar properly is a fundamental skill for any aspiring home chef. In this guide, we’ll take you through the steps of melting sugar with precision and flair, unlocking the secrets to creating the perfect caramel.

There are 7 Steps of Melting Sugar

Gather Your Tools and Ingredients

Before diving into the sugar-melting process, it’s crucial to have all your tools and ingredients ready. Here’s what you’ll need:

  • Granulated sugar
  • A heavy-bottomed saucepan
  • Water
  • A wooden spoon or heat-resistant spatula
  • A candy thermometer (optional)
  • Cold water in a bowl (for emergencies)
  • Oven mitts or kitchen gloves

Select the Right Pan

Choosing the appropriate saucepan is paramount to the success of your sugar-melting endeavor. Opt for a heavy-bottomed pan, such as a stainless steel or copper one. The heavy bottom distributes heat evenly, preventing hot spots that can cause sugar to burn or crystallize prematurely.

Measure Your Sugar and Add Water

Start by measuring the desired amount of granulated sugar you need for your recipe. Place it into the clean, dry saucepan. To aid the melting process and prevent premature crystallization, add a small amount of water. Typically, you’ll want to use about one-quarter cup of water per cup of sugar.

Heat Gradually

Place the saucepan over medium heat. Allow the sugar to gradually dissolve into the water. Do not stir at this stage, as it can cause the sugar to crystallize. Instead, swirl the pan gently to ensure even heating. A candy thermometer can be helpful here, but it’s not mandatory.

Observe the Color Change

As the sugar syrup heats, it will start to change color from clear to pale yellow, then to amber. The transformation can be quite rapid, so keep a close eye on it. Once it reaches your desired caramelization level (light, medium, or dark caramel), remove it from the heat immediately to prevent overcooking.

Cooling and Using Caramel

Once you’ve achieved the perfect caramel color, carefully place the saucepan on a heat-resistant surface. Be cautious as the caramel is extremely hot.

If you’re using the caramel for a sauce, you can add cream or butter at this stage to create a luscious caramel sauce. Remember to do this gradually and whisk constantly.

If you’re making caramel decorations or spun sugar, allow the caramel to cool slightly until it thickens but remains pourable. Then, use a fork or whisk to create beautiful designs or drizzle it over your desserts.

Safety Precautions

Molten sugar can cause severe burns, so always exercise caution when working with it. If you accidentally spill hot caramel on your skin, immediately immerse the affected area in cold water to minimize damage. Keep children and pets away from the cooking area during this process.

FAQs

Can I melt sugar without water?

Yes, you can melt sugar without water, but it requires a different technique. Dry caramelization involves melting sugar directly in a clean, dry saucepan over low to medium heat. Stir the sugar constantly with a wooden spoon or heat-resistant spatula as it begins to melt. Be vigilant, as dry caramelization can quickly go from amber to burnt. Once you achieve the desired caramel color, remove it from the heat immediately and proceed with your recipe.

Why does my melted sugar sometimes crystallize or become grainy?

Crystallization can occur if even a small crystal of sugar is introduced into the syrup during the melting process. To prevent crystallization, make sure your saucepan and utensils are clean and dry before you start. Avoid stirring the sugar until it has fully dissolved, and use a wet pastry brush to wash down any sugar crystals that may have adhered to the sides of the saucepan. Additionally, adding a small amount of acid, like cream of tartar or lemon juice, to the sugar-water mixture can help inhibit crystallization.

Can I reuse burnt caramel or sugar?

Unfortunately, once sugar or caramel has burned, it cannot be salvaged for most culinary purposes. Burnt sugar takes on a bitter taste that can negatively affect the flavor of your dish. However, you can learn from the experience and try again with fresh sugar to achieve the desired caramelization. To avoid burning in the future, maintain a close watch over the sugar as it melts and remove it from the heat as soon as it reaches the desired color.

Conclusion

Learning how to melt sugar is a skill that opens the door to a world of delicious possibilities in the kitchen. With the right tools, patience, and a little practice, you can master the art of caramelization. Whether you’re creating a stunning dessert centerpiece or crafting a delectable sauce, the secrets to melting sugar have been unveiled. So, get ready to add a touch of sweetness and sophistication to your culinary creations!

How Much Does a Stick of Butter Weigh? Unravelling the Weighty Delight

When it comes to baking and cooking, precision is key. A pinch too much of one ingredient or a dash too little of another can make or break your culinary masterpiece. Among the staple ingredients in many recipes, butter holds a hallowed place. From flaky croissants to mouth watering cookies, butter adds that lusciousness that delights our taste buds. But have you ever found yourself wondering, “How much does a stick of butter weigh?” Fear not, for we are about to unveil the buttery truth.

There are 5 Steps to Unveil the Buttery Truth

The Classic Stick of Butter: A Familiar Friend in the Kitchen

A stick of butter is a ubiquitous presence in kitchens around the world. Whether you’re a seasoned chef or an aspiring home cook, you’ve likely encountered this golden-hued ingredient in numerous recipes. It’s that rectangular piece of creamy goodness that often comes wrapped in paper or foil, making it both convenient and recognizable.

Unveiling the Numbers: The Weight of a Stick of Butter

So, exactly how much does a stick of butter weigh? The answer may vary depending on where you live, as butter packaging can differ between countries. However, in the United States, the standard measure is 1/2 cup or 4 ounces, which is equivalent to 113.4 grams or about 1/4 pound. This measurement holds true for the common 4-stick package that you’ll find in most grocery stores.

East vs. West: Butter Measurements Around the Globe

Venture beyond the borders of the United States, and you’ll discover that the weight of a stick of butter can differ internationally. In the United Kingdom, a standard stick of butter weighs approximately 125 grams, slightly more than its American counterpart. Meanwhile, down under in Australia, a stick usually weighs 250 grams, making it twice as hefty as the U.S. version.

Butter by Any Other Name: Unconventional Packaging

While sticks of butter are the norm in many places, some regions opt for different packaging methods. In Europe, for instance, butter is often sold in blocks or tubs, with weights ranging from 200 to 250 grams. These variations in packaging not only reflect cultural preferences but also provide options for different culinary applications.

Getting the Measurements Right: Essential Tips for Precision

Now that you know the typical weight of a stick of butter, ensuring precise measurements in your recipes is a breeze. But what if you don’t have a kitchen scale on hand? Fear not! You can use common kitchen tools to estimate the weight. A standard stick of butter is usually about the size of your thumb. If a recipe calls for half a stick, simply halve that measurement. Remember, a little extra butter might not hurt, but accuracy can elevate your culinary creations to new heights.

FAQs

How much does a stick of butter weigh in the United States?

In the United States, a standard stick of butter typically weighs 4 ounces, which is equivalent to about 113.4 grams or approximately 1/4 pound. This measurement is consistent with the common 4-stick package found in most grocery stores. It’s important to note that this weight might vary slightly based on the brand or packaging.

What is the weight of a stick of butter in other countries?

The weight of a stick of butter can vary internationally. For instance, in the United Kingdom, a standard stick of butter weighs around 125 grams, which is slightly heavier than the American counterpart. On the other hand, in Australia, a stick of butter usually weighs about 250 grams, making it twice as heavy as the U.S. version. These differences in weight reflect regional preferences and packaging variations.

Can I estimate the weight of a stick of butter without a kitchen scale?

Yes, you can estimate the weight of a stick of butter even without a kitchen scale. A standard stick of butter is roughly the size of your thumb. If a recipe calls for half a stick, you can easily estimate by halving that size. Keep in mind that while accuracy is essential in baking and cooking, a little extra butter is unlikely to significantly alter the outcome of your dish. However, for the best results, especially in baking, it’s recommended to use a kitchen scale whenever possible to ensure precise measurements.

Conclusion

From mouth watering pastries to savory sauces, butter plays a pivotal role in the world of gastronomy. Understanding the weight of a stick of butter empowers you to create delectable dishes with precision and confidence. So, whether you’re whipping up a batch of chocolate chip cookies or perfecting your pie crust game, you now possess the buttery knowledge to make it a success. Happy cooking!

How to Make an Ice Cream Cake: A Delicious Delight for Every Occasion

When it comes to desserts that combine the best of both worlds – ice cream and cake – nothing beats the delightful creation known as an ice cream cake. This frozen treat is a perfect fusion of creamy, icy goodness and moist, flavorful cake layers. Whether you’re celebrating a birthday, a summer soirée, or just satisfying your sweet tooth, learning how to make an ice cream cake is a skill worth mastering. In this article, we’ll guide you through the process step by step, ensuring that your ice cream cake is not only delectable but also visually appealing.

There are 4 Process  to Make an Ice Cream Cake

Gathering Your Ingredients and Tools

Before you embark on your ice cream cake-making journey, gather all the necessary ingredients and tools. Here’s a list to get you started:

Ingredients:

  • Ice cream (various flavors of your choice)
  • Cake layers (homemade or store-bought)
  • Frosting or whipped cream
  • Toppings (chocolate chips, sprinkles, fruits, etc.)

Tools:

  • Springform pan or cake pan with removable bottom
  • Parchment paper
  • Mixing bowls
  • Spatula
  • Freezer-safe plastic wrap
  • Knife or cake slicer
  • Optional: offset spatula for smoother frosting

Assembling the Ice Cream Cake

Prepare the Cake Layers: 

If you’re making homemade cake layers, bake and cool them according to your recipe. Alternatively, purchase pre-made cake layers to save time.

Line the Pan: 

Line the bottom of your springform pan or cake pan with parchment paper. This will make it easier to remove the cake once it’s frozen.

Layering the Cake: 

Place one cake layer at the bottom of the pan. If needed, trim it to fit the pan’s size. Spread a layer of softened ice cream over the cake. You can use one flavor or create a swirl with different flavors.

Add Toppings: 

Sprinkle your chosen toppings over the ice cream layer. This is where you can get creative – think crushed cookies, chopped nuts, or even a drizzle of caramel sauce.

Repeat the Layers: 

Add another cake layer on top of the toppings, followed by another layer of ice cream and more toppings. You can alternate ice cream flavors and toppings for a stunning visual effect.

Final Cake Layer: 

Finish with a final layer of cake on top. Press gently to make sure the layers adhere.

Freezing and Finishing Touches

Wrap and Freeze: 

Cover the cake with plastic wrap or aluminum foil to prevent freezer burn. Place the cake in the freezer and let it set for at least 4-6 hours, or preferably overnight.

Frosting: 

Once the cake is frozen, remove it from the pan. If desired, frost the cake with whipped cream or your favorite frosting. An offset spatula can help create a smooth, polished look.

Decorate: 

Get ready to showcase your decorating skills! Add more toppings, swirls of whipped cream, or chocolate shavings to make your ice cream cake truly eye-catching.

Serve and Enjoy: 

After decorating, return the cake to the freezer for a short while to set the frosting. When it’s time to serve, use a sharp knife dipped in warm water to slice through the frozen layers.

Tips and Tricks for Ice Cream Cake Success

Softening Ice Cream: 

Let the ice cream soften slightly before spreading it over the cake layers. This will make it easier to work with.

Variety is Key: 

Experiment with different ice cream flavors, cake types, and toppings to create unique combinations.

Quick Assembly: 

If you’re short on time, use store-bought cake layers and soften the ice cream just enough to make it spreadable.

Prevent Soggy Cake: 

To prevent the cake from becoming too soggy, make sure the ice cream layers are not overly melted when assembling.

Plan Ahead: 

Ice cream cakes require time for freezing between layers. Start the process a day in advance to ensure a well-set cake.

FAQs

Can I use any type of ice cream and cake for making an ice cream cake?

Absolutely! One of the joys of making an ice cream cake is the endless customization options. You can use any flavor of ice cream that you love, whether it’s classic vanilla, rich chocolate, or a more adventurous option like mint chocolate chip or strawberry. As for the cake, you can choose to bake your own layers or opt for store-bought cake layers. The key is to ensure that the ice cream and cake flavors complement each other well. Don’t be afraid to experiment with different combinations to create your perfect ice cream cake masterpiece.

Can I make an ice cream cake without an ice cream maker?

Certainly! You don’t need an ice cream maker to create a delicious ice cream cake. For this frozen delight, you’ll be using pre-made ice cream. Simply let the ice cream soften slightly at room temperature until it’s easily spreadable. Once it’s softened, you can layer it with your cake and toppings in a pan, and then freeze the entire cake to set the layers. If you want to get creative, you can even swirl different flavors of softened ice cream together for a marbled effect. The absence of an ice cream maker won’t hold you back from crafting a delectable ice cream cake.

How do I prevent the cake from getting too soggy in an ice cream cake?

Preventing a soggy cake in your ice cream cake is all about timing and technique. Here are a few steps to help you avoid a mushy dessert:

Chill the Cake Layers: 

Make sure your cake layers are completely cooled before assembling the ice cream cake. Warm cake layers can melt the ice cream too quickly, resulting in a soggy texture.

Thorough Freezing: 

Ensure that each ice cream layer is fully frozen before adding the next cake or ice cream layer. This will help maintain the distinct layers and prevent excessive moisture.

Quick Assembly: 

Assemble the cake layers and ice cream efficiently, working swiftly to minimize the time the ice cream is exposed to warmer temperatures.

Firm Ice Cream: 

Soften the ice cream just enough to make it spreadable, but not so much that it becomes runny. This will help maintain the structure of the cake.

Avoid Over-Melting: 

When spreading ice cream over the cake layers, make sure it’s not overly melted. If the ice cream starts to melt too much, return the cake to the freezer for a short while before continuing.

By following these steps and being mindful of the temperature and consistency of your ingredients, you can create a luscious ice cream cake with perfectly distinct layers and a delightful texture.

Conclusion

Learning how to make an ice cream cake opens the door to a world of delightful dessert possibilities. With a few simple steps and a touch of creativity, you can create a show-stopping treat that will impress your guests and satisfy your cravings. So, gather your ingredients, follow our guide, and indulge in the heavenly combination of ice cream and cake – a match made in dessert heaven!

Mastering the Art of Baking in the Instant Pot Duo: Ultimate Guide

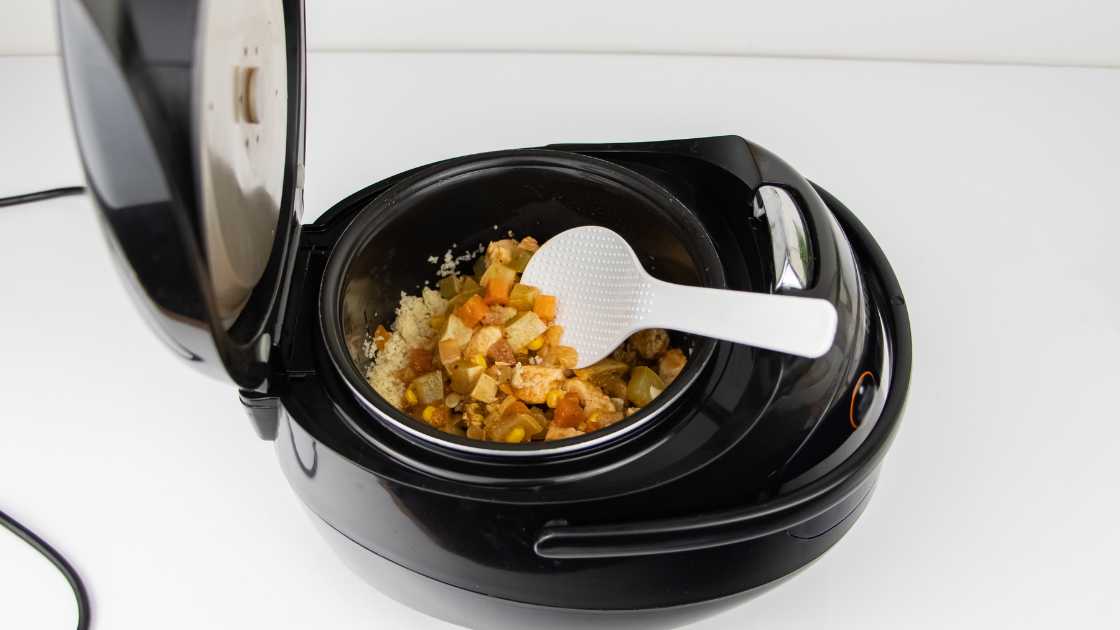
The Instant Pot Duo has become a kitchen staple for its versatility and convenience. While it’s widely known for its ability to pressure cook, did you know that you can also bake in your Instant Pot Duo? Yes, you read that right! In this comprehensive guide, we’ll take you through the step-by-step process of baking delicious treats using your Instant Pot Duo. Get ready to unleash your inner baker and create mouthwatering desserts with this incredible kitchen appliance!

Gather Your Ingredients and Equipment

Before diving into the world of baking with your Instant Pot Duo, it’s essential to gather all the necessary ingredients and equipment. Here’s what you’ll need:

Instant Pot Duo

Baking pan or dish that fits inside the Instant Pot

Mixing bowls and spoons

Measuring cups and spoons

Oven-safe trivet or a sling to lift the pan out of the Instant Pot

Parchment paper (optional)

Choose the Right Recipes

Not all recipes are suitable for baking in the Instant Pot Duo. Opt for recipes specifically designed for pressure cooking or adapted for Instant Pot baking. These recipes take into account the unique cooking environment and will ensure the best results. You can find a wide variety of Instant Pot baking recipes online or in cookbooks dedicated to the topic.

Prep Your Instant Pot

Before starting the baking process, make sure your Instant Pot is clean and in proper working condition. Ensure that the sealing ring is securely in place, and the venting knob is set to the sealing position.

Adjusting the Recipe

When using traditional oven recipes, it’s essential to make a few adjustments to achieve optimal results in the Instant Pot Duo. Firstly, reduce the amount of liquid in the recipe by about 20%, as the Instant Pot requires less moisture than an oven. Additionally, increase the cooking time slightly, as the Instant Pot takes longer to reach the desired temperature compared to a conventional oven.

Preheating the Instant Pot

Unlike an oven, the Instant Pot does not require preheating. Simply add the recommended amount of water to the inner pot, and the steam generated during baking will create a perfect baking environment.

Preparing the Batter

Follow the recipe instructions to prepare your batter or dough. Be sure to mix the ingredients thoroughly to ensure even distribution. If the recipe calls for greasing the pan, you can also line it with parchment paper for easy removal of the baked goods.

Baking in the Instant Pot Duo

Place the prepared baking pan on an oven-safe trivet or sling, and carefully lower it into the Instant Pot. Secure the lid and set the cooking time and pressure level according to the recipe. Once the baking cycle is complete, allow the Instant Pot to release the pressure naturally for a few minutes before performing a quick release.

Cooling and Serving

After removing the baked goods from the Instant Pot, let them cool in the pan for a few minutes. Use a knife to gently loosen the edges if necessary, and then transfer them to a wire rack to cool completely. Once cooled, serve your delectable treats and enjoy the fruits of your Instant Pot baking adventure!

FAQs

Can I bake in the Instant Pot Duo?

Absolutely! While the Instant Pot Duo is primarily known for its pressure cooking capabilities, it can also be used for baking. With a few adjustments to your recipes and the right techniques, you can achieve fantastic results and bake a variety of delicious treats in your Instant Pot Duo.

What types of recipes can I bake in the Instant Pot Duo?

The Instant Pot Duo is suitable for baking a wide range of recipes, including cakes, bread, muffins, cheesecakes, and even custards. However, it’s important to choose recipes specifically designed or adapted for the Instant Pot to ensure the best outcome. Look for Instant Pot baking recipes online or refer to cookbooks dedicated to Instant Pot baking for a variety of inspiring options.

Are there any special considerations or adjustments needed when baking in the Instant Pot Duo?

Yes, there are a few adjustments to keep in mind when baking in the Instant Pot Duo. Firstly, reduce the amount of liquid in your recipes by approximately 20%, as the Instant Pot requires less moisture compared to conventional ovens. Additionally, increase the cooking time slightly, as the Instant Pot takes longer to reach the desired temperature. These adjustments will help you achieve the perfect texture and consistency in your baked goods.

Conclusion

With the Instant Pot Duo, you can take your baking skills to new heights. Follow the steps outlined in this guide, experiment with different recipes, and amaze your friends and family with homemade baked goods that are perfectly cooked in your trusty Instant Pot. Embrace the convenience and versatility of this remarkable kitchen appliance, and embark on a baking journey like never before!

Room Temperature vs. Cold Cream Cheese: How it  Affects Your Baking and Recipes

When it comes to baking with cream cheese, the temperature at which you use it can make a big difference in the final outcome of your recipe. Using cream cheese that is too cold or too warm can result in a dense, lumpy, or even grainy texture that can ruin the taste and presentation of your dish. In this article, we’ll explore the differences between room temperature and cold cream cheese and how they affect your baking and recipes.

Room Temperature vs. Cold Cream Cheese

What is Room Temperature Cream Cheese?

Room temperature cream cheese is soft, spreadable, and at a consistent temperature of around 68 to 72 degrees Fahrenheit. It is best used for recipes that require blending, mixing, or beating. This temperature allows the cream cheese to easily combine with other ingredients and creates a smooth and creamy texture.

What is Cold Cream Cheese?

Cold cream cheese is straight from the refrigerator, and its temperature is around 40 degrees Fahrenheit. It is harder and more challenging to blend and mix with other ingredients compared to room temperature cream cheese. Using cold cream cheese can result in a lumpy or grainy texture that is not desirable in most baking recipes.

How Does Room Temperature vs. Cold Cream Cheese Affect Your Recipes?

The texture and consistency of cream cheese can drastically affect your baked goods and other recipes. When cream cheese is too cold, it will not blend or mix evenly with other ingredients. This can lead to clumps and lumps, which will affect the texture of your baked goods or frosting.

On the other hand, when cream cheese is at room temperature, it blends more easily and creates a smooth and consistent texture. This is essential when making cheesecake, frosting, or any recipe that requires a creamy, smooth texture. Room temperature cream cheese also produces a lighter and fluffier texture when beaten or mixed, which makes it ideal for recipes that call for it.

Tips for Softening Cream Cheese

If you forget to take your cream cheese out of the fridge ahead of time, there are still ways to soften it quickly. Here are a few tips:

Remove the cream cheese from the packaging and microwave it for 15-20 seconds. Be careful not to overheat it as it can melt and ruin your recipe.

Cut the cream cheese into small cubes and leave it on the counter for about 30 minutes. This will help it reach room temperature faster.

Place the cream cheese in a sealed plastic bag and immerse it in a bowl of warm water for 10-15 minutes. This method is especially useful when you need to soften a larger amount of cream cheese.

FAQ,s

What happens if I use cold cream cheese instead of room temperature cream cheese in my recipe?

Using cold cream cheese in your recipe can result in a lumpy or grainy texture that is not desirable in most baking recipes. Cold cream cheese is harder and more challenging to blend and mix with other ingredients compared to room temperature cream cheese. This can lead to clumps and lumps, which will affect the texture of your baked goods or frosting.

How long does it take for cream cheese to reach room temperature?

It typically takes about 30 to 60 minutes for cream cheese to reach room temperature, depending on the temperature of your kitchen. To speed up the process, you can cut the cream cheese into small cubes and leave it on the counter for about 30 minutes or place it in a sealed plastic bag and immerse it in a bowl of warm water for 10-15 minutes.

Can I use a microwave to soften cream cheese quickly?

Yes, you can soften cream cheese quickly using a microwave. Remove the cream cheese from the packaging and microwave it for 15-20 seconds. Be careful not to overheat it as it can melt and ruin your recipe. It’s best to microwave in short increments and check the consistency after each interval.

Conclusion

The temperature of cream cheese can significantly affect your recipes, especially when it comes to baking. Using room temperature cream cheese creates a smooth, consistent texture, which is essential in many recipes. Cold cream cheese can lead to lumps and grains, making it difficult to blend and mix. When possible, allow cream cheese to reach room temperature before using it in your recipes. If you forget, use one of the tips above to soften it quickly.

Is Almond Milk Vegan?

Almond milk has become a popular plant-based milk alternative in recent years, particularly among those who follow a vegan lifestyle. However, some people may wonder whether almond milk is actually vegan or not. In this article, we will explore the question of whether almond milk is a vegan-friendly option.

What is Almond Milk?

Almond milk is a plant-based milk alternative made by blending almonds and water. The resulting mixture is then strained to remove any solid particles, resulting in a smooth and creamy liquid that is similar in texture to cow’s milk. Almond milk is often fortified with additional vitamins and minerals, such as calcium, vitamin D, and vitamin B12.

Is Almond Milk Vegan?

Yes, almond milk is considered to be vegan. Since it is made entirely from plant-based ingredients, almond milk does not contain any animal products or byproducts. As such, it is a suitable alternative for those who follow a vegan diet or lifestyle.

Benefits of Almond Milk for Vegans

Almond milk offers a range of benefits for vegans, including:

Nutrient-rich: Almond milk is often fortified with additional vitamins and minerals, such as calcium, vitamin D, and vitamin B12. This can help vegans ensure that they are meeting their daily nutrient requirements.

Low in calories: Almond milk is generally lower in calories than cow’s milk, making it a good option for those who are trying to maintain a healthy weight.

Versatile: Almond milk can be used in a variety of ways, such as in coffee, smoothies, and baking. This makes it a versatile ingredient that can be used in a range of vegan recipes.

Environmentally friendly: Producing almond milk requires less water and produces fewer greenhouse gas emissions than producing cow’s milk. As such, consuming almond milk can be seen as a more environmentally friendly choice.

FAQ’s

Is almond milk vegan?

Yes, almond milk is considered to be vegan. Since it is made entirely from plant-based ingredients, almond milk does not contain any animal products or byproducts.

What are the benefits of almond milk for vegans?

Almond milk offers a range of benefits for vegans, including:

Nutrient-rich: Almond milk is often fortified with additional vitamins and minerals, such as calcium, vitamin D, and vitamin B12. This can help vegans ensure that they are meeting their daily nutrient requirements.

Low in calories: Almond milk is generally lower in calories than cow’s milk, making it a good option for those who are trying to maintain a healthy weight.

Versatile: Almond milk can be used in a variety of ways, such as in coffee, smoothies, and baking. This makes it a versatile ingredient that can be used in a range of vegan recipes.

Are there any potential drawbacks to consuming almond milk as a vegan?

While almond milk can be a great option for vegans, it is important to note that some store-bought varieties may contain additives such as sweeteners and thickeners. Additionally, almond milk may not be suitable for those with nut allergies. It is always important to read the ingredient list and check with a healthcare provider if you have any concerns about consuming almond milk.

Conclusion

In conclusion, almond milk is a vegan-friendly milk alternative that can provide a range of benefits for those who follow a vegan diet or lifestyle. Not only is it nutrient-rich and versatile, but it is also environmentally friendly and can be used in a range of vegan recipes. So, if you are looking for a plant-based milk alternative, almond milk may be a great option for you.

How to Store Cooked Food: A Comprehensive Guide

Storing cooked food properly is an essential skill for any home cook or chef. Proper storage not only ensures that your food stays fresh, but it also helps to prevent foodborne illness. In this article, we’ll provide you with a comprehensive guide on how to store cooked food effectively, including tips and tricks for storing various types of foods.

Cool Food Down Properly

Before storing cooked food, it is essential to cool it down properly. Cooling food down quickly is essential because bacteria grow rapidly at temperatures between 40°F and 140°F. To cool food down quickly, divide it into smaller portions and place it in shallow containers. Then, place the containers in the refrigerator or freezer. You can also place the containers in an ice bath to speed up the cooling process.

Use Appropriate Containers

When storing cooked food, it is essential to use appropriate containers. Choose containers that are airtight and leak-proof to prevent moisture from escaping and air from entering. Glass or plastic containers with tight-fitting lids are an excellent option. You can also use resealable plastic bags, but make sure they are specifically designed for food storage.

Label Your Containers

Labeling your containers is an essential step when storing cooked food. Labeling helps you keep track of what you’ve stored and when you stored it. Write the date and contents on the label, so you know how long the food has been in the refrigerator or freezer. It’s also helpful to include reheating instructions on the label.

Store Food in the Right Place

When storing cooked food, it’s essential to store it in the right place. Some foods should be stored in the refrigerator, while others can be stored in the freezer. Foods that are high in moisture, such as cooked vegetables, should be stored in the refrigerator. Foods that are low in moisture, such as cooked meats, can be stored in the freezer.

Store Food at the Right Temperature

Storing cooked food at the right temperature is essential to prevent bacteria from growing. Keep the refrigerator temperature at 40°F or below and the freezer temperature at 0°F or below. Make sure to keep the refrigerator and freezer doors closed as much as possible to maintain the correct temperature.

Follow Food Safety Guidelines

When storing cooked food, it’s essential to follow food safety guidelines. Avoid storing food at room temperature for more than two hours. If the temperature is above 90°F, food should not be left out for more than one hour. Always wash your hands before handling food and use separate cutting boards for raw and cooked foods.

FAQ’s

Can I put hot food directly into the refrigerator for storage?

No, it’s not recommended to put hot food directly into the refrigerator for storage. Doing so can raise the temperature inside the refrigerator and increase the risk of foodborne illness. Instead, let the food cool down to room temperature before transferring it to an airtight container and placing it in the refrigerator.

How long can I store cooked food in the refrigerator?

Cooked food can typically be stored in the refrigerator for up to four days. However, it’s essential to follow proper storage guidelines to ensure the food stays fresh and safe to eat. Always store food in airtight containers, label them with the date, and keep the refrigerator temperature at 40°F or below.

Can I freeze cooked food more than once?

While it’s technically safe to refreeze cooked food, it’s not recommended. Refreezing can affect the texture and quality of the food and increase the risk of foodborne illness. If you’re not sure if you’ll use all the cooked food within a few days, divide it into smaller portions and freeze only what you’ll need. This way, you can thaw just the amount you need and reduce the risk of waste.

Conclusion

Storing cooked food properly is essential to ensure it stays fresh and safe to eat. Cool food down properly, use appropriate containers, label your containers, store food in the right place and at the right temperature, and follow food safety guidelines. With these tips and tricks, you’ll be able to store cooked food effectively and keep your family safe from foodborne illness.

Is yoplait yogurt healthy for you? The Pros and Cons of Including it in Your Diet

This article is about the benefits of yogurt, specifically “Yoplait Yogurt”. Yoplait yogurt is a product that has been around for many years and has received a lot of positive attention in recent years. It is thought to be healthy for you due to its low-calorie count and its low sugar content.

The Yoplait line of products contains a lot of beneficial nutrients. More than 80 unique tastes and a wide variety of varieties ensure that there is something delicious here for everyone. The thick, non-fat yogurt is great for snacking on the move because it’s convenient and easy to carry.

What is yoplait yogurt?

Yoplait yogurt is the world’s largest franchise brand of yogurt. Yoplait yogurt is a soft and creamy yogurt that has been enjoyed by people of all ages for over 57 years (1965). yoplait yogurt is made with natural flavors and ingredients that are healthy for you and your family.

The history of Yoplait

In 1965, France’s dairy co-ops decided to come together and start selling their products themselves. This decision led to more than 100,000 farmers from six co-ops coming together and starting their own businesses. The success of these businesses has helped to keep France’s dairy industry strong and continue to provide a healthy supply of milk for the population.

The flavors and ingredients in Yoplait Yogurt

Yoplait yogurt has been featured on news programs and in the media for its high-quality ingredients. But what are some of these key ingredients? Every 6-ounce container has a tablespoon and a half of sugar, corn starch, gelatin, pectin, artificial color, flavor, and vitamins.

Blueberry, Vanilla, Strawberry Banana, Harvest Peach, Strawberry are all flavors of yogurt that Yoplait makes. These flavors are great for a snack or as a way to load up on flavor in your yogurt bowl.

Things makes Yoplait yogurt different from other yogurts

What makes yoplait yogurt different from other yogurts? For starters, yoplait yogurt is made with two sugars – sugar alcohols – which gives it a sweeter flavor and helps to prevent Grammy. Additionally, the yogurt is also low in fat and calories, making it a healthy option for those on a diet or who are looking for a lower-calorie option.

Some health benefits of eating Yoplait yogurt

There are many health benefits to eating Yoplait yogurt. Yoplait yogurt is a great source of calcium and protein, which is needed for strong bones. It is also a low-fat yogurt that contains beneficial oil. This yogurt is a good addition to your diet because it helps you keep your bones healthy and strong.

It has probiotics, healthy bacteria in yogurt that can promote digestive health and improve overall gut function. It is also a low-calorie snack that helps you lose weight. Yoplait yogurt is fortified with vitamin D, which can help protect the skin against sun damage and retarded aging and recent studies have found that vitamin D can reduce the formation and storage of new fat cells, which may help reduce body fat.

It is common practice to prescribe low-fat Yoplait, which contains 2% fat, and to provide it as a nice post-workout meal in the form of smoothies due to the fact that it aids in the healing of muscles.

Is Yoplait yogurt full of sugar?

Yoplait yogurt has around 20 grams of added sugar per 8-oz serving, which is about half the amount found in commercially-available yogurt products. This amount is more than what’s found in most cases of “added sugar” labels on food products. For people who are interested in eating more sugar-free foods, Yoplait should be a top choice.

Another Healthy Recipe: Quick And Easy Christmas Cake Recipes

In final words

Some people may believe that yoplait yogurt is healthy for you, based on the ingredients and claims made by the company. However, further research may need to be conducted in order to make a definite determination.

How Long Does Banana Pudding Last?

Banana pudding is a classic dish that many Americans enjoy. Banana pudding is a dessert prepared with banana puree and sugar. The dish is frequently served as a dessert or snack. It is also simple to prepare, making it a popular option for people searching for a quick and easy dessert. There are many variations of banana pudding, including one that includes a bar of chocolate hidden in the banana.

What state is known for banana pudding?

The state of Massachusetts is well known for its dessert, banana pudding. However, the most common recipe for this meal originates from South Carolina.

According to legend, this dessert was created in the early 1800s by a woman named Mrs. James. It is reported that she was inspired to make it after seeing a television program about bananas. It is also stated that she ate it with sugar and flour rather than butter and eggs.

Can I freeze banana pudding?

Banana pudding is a freezer-friendly dessert. Banana pudding comes in a variety of flavors, but the basic recipe asks for bananas, sugar, eggs, and vanilla essence. Individual portions or the full container of ingredients can be frozen. Once frozen, the pudding can be stored in a covered container at room temperature or in the freezer.

Read More: What Type of Knife Do You Use for Onions?

It is critical to use cold water rather than boiling water while freezing banana pudding. This keeps the pudding from being too thick and heavy. If you mistakenly add too much heat to the mixture when freezing, your pudding will most likely stick and not freeze correctly. Before beginning to create the custard, use a kitchen scale to measure out the necessary amount of sugar and butter. Once everything is combined, pour into an ice cream maker or freeze according to your preference.

How long will banana pudding stay fresh?

Banana pudding is a classic dish that many people enjoy. It is easy to make and can last for up to two weeks in the freezer. However, it is important to remember that banana pudding should be consumed within 3 or 4 days and cannot be stored in a fridge or freezer for an extended period of time.

How long can banana pudding last in the fridge without bananas?

By placing it in a plastic container and covering it, banana pudding may be stored in the fridge for up to four days.

This will keep it protected from spoiling. Because the components in banana pudding are fragile, freezing it for an extended period of time can damage the texture.

How long is homemade pudding good for?

Although not everyone appreciates the flavor of homemade pudding, it may be a long-standing favorite for others.

If you’re one of those folks, you’re undoubtedly aware that homemade banana pudding can be stored in the refrigerator for up to four days. Simply allow it to cool fully before serving to allow the flavors to mingle and the texture to improve.

Why does my banana pudding get watery?

This may appear to be an easy issue, yet many people are puzzled as to why their banana pudding becomes watery. The solution is that the ingredients were mixed too violently, causing the pudding to become thick and wet. If the ingredients are mixed properly, they will combine to form a light and fluffy pudding.

Do you eat banana pudding hot or cold?

Do you like banana pudding? If so, you’ll adore the Southern twist on this classic dessert. Many people prefer to eat banana pudding warm, but there are also cooled variants. The trick is to strictly adhere to the recipe and enjoy the warm or cold texture of this famous meal.