How to Remove Stuck Cupcake Liners: Tips and Tricks

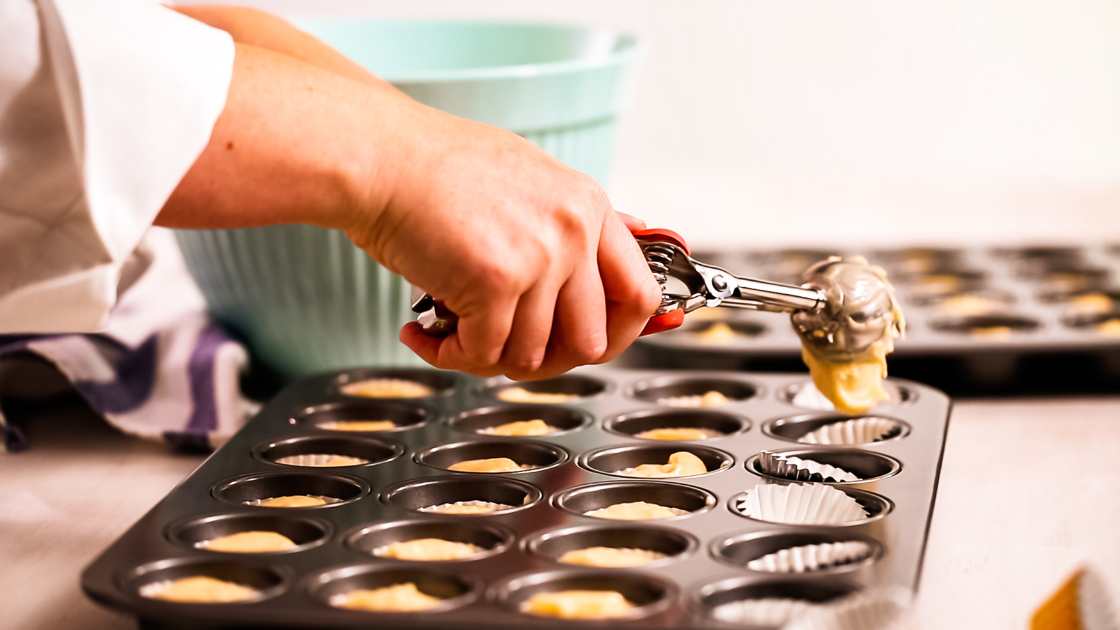
Cupcake liners are a great way to dress up your cupcakes and make them look more professional. However, sometimes the liners can get stuck to the cupcakes, making it difficult to remove them without ruining the cupcake. In this article, we will share some tips and tricks on how to remove stuck cupcake liners without damaging the cupcakes.

Let the Cupcakes Cool Completely

The first step in removing stuck cupcake liners is to let the cupcakes cool completely. If you try to remove the liners while the cupcakes are still warm, they are more likely to stick to the cupcakes. Wait at least 30 minutes or until the cupcakes have cooled completely before attempting to remove the liners.

Gently Twist the Cupcake Liners

After the cupcakes have cooled completely, gently twist the cupcake liners to loosen them from the cupcakes. Start by gently twisting the liner back and forth to loosen it from the cupcake. Be careful not to pull too hard, as this could damage the cupcake.

Use a Butter Knife to Loosen the Liner

If the cupcake liners are still stuck after twisting them, you can use a butter knife to loosen the liner from the cupcake. Gently slide the knife between the liner and the cupcake, being careful not to damage the cupcake. Once the knife is inserted, gently twist it to loosen the liner from the cupcake.

Use Cooking Spray

Another trick to prevent cupcake liners from sticking is to spray them with cooking spray before pouring the batter. If you forget to do this and the liners get stuck, you can spray a little cooking spray between the liner and the cupcake to help loosen it.

Freeze the Cupcakes

If all else fails, you can try freezing the cupcakes for a few minutes to help loosen the liners. Place the cupcakes in the freezer for about 5-10 minutes, then remove them and gently twist the liners to loosen them from the cupcakes.

FAQs

Why do cupcake liners get stuck to the cupcakes?

Cupcake liners can get stuck to the cupcakes for several reasons, such as overfilling the liners, using low-quality liners, or not letting the cupcakes cool completely before removing the liners.

Can I reuse a cupcake liner that got stuck to the cupcake?

It is not recommended to reuse a cupcake liner that has been stuck to the cupcake as it may not hold its shape and could result in a messy cupcake. It’s best to discard the liner and use a fresh one.

Is there a way to prevent cupcake liners from sticking in the first place?

Yes, there are a few ways to prevent cupcake liners from sticking to the cupcakes. One way is to spray the liners with cooking spray before pouring the batter. Another way is to use high-quality liners that are less likely to stick. Additionally, make sure to let the cupcakes cool completely before removing the liners.

Conclusion

In conclusion, removing stuck cupcake liners can be a frustrating experience, but with a little patience and these tips and tricks, you can easily remove them without damaging the cupcakes. Remember to let the cupcakes cool completely, gently twist the liners, use a butter knife to loosen them, spray them with cooking spray, or freeze them for a few minutes to help loosen the liners.

Room Temperature vs. Cold Cream Cheese: How it  Affects Your Baking and Recipes

When it comes to baking with cream cheese, the temperature at which you use it can make a big difference in the final outcome of your recipe. Using cream cheese that is too cold or too warm can result in a dense, lumpy, or even grainy texture that can ruin the taste and presentation of your dish. In this article, we’ll explore the differences between room temperature and cold cream cheese and how they affect your baking and recipes.

Room Temperature vs. Cold Cream Cheese

What is Room Temperature Cream Cheese?

Room temperature cream cheese is soft, spreadable, and at a consistent temperature of around 68 to 72 degrees Fahrenheit. It is best used for recipes that require blending, mixing, or beating. This temperature allows the cream cheese to easily combine with other ingredients and creates a smooth and creamy texture.

What is Cold Cream Cheese?

Cold cream cheese is straight from the refrigerator, and its temperature is around 40 degrees Fahrenheit. It is harder and more challenging to blend and mix with other ingredients compared to room temperature cream cheese. Using cold cream cheese can result in a lumpy or grainy texture that is not desirable in most baking recipes.

How Does Room Temperature vs. Cold Cream Cheese Affect Your Recipes?

The texture and consistency of cream cheese can drastically affect your baked goods and other recipes. When cream cheese is too cold, it will not blend or mix evenly with other ingredients. This can lead to clumps and lumps, which will affect the texture of your baked goods or frosting.

On the other hand, when cream cheese is at room temperature, it blends more easily and creates a smooth and consistent texture. This is essential when making cheesecake, frosting, or any recipe that requires a creamy, smooth texture. Room temperature cream cheese also produces a lighter and fluffier texture when beaten or mixed, which makes it ideal for recipes that call for it.

Tips for Softening Cream Cheese

If you forget to take your cream cheese out of the fridge ahead of time, there are still ways to soften it quickly. Here are a few tips:

Remove the cream cheese from the packaging and microwave it for 15-20 seconds. Be careful not to overheat it as it can melt and ruin your recipe.

Cut the cream cheese into small cubes and leave it on the counter for about 30 minutes. This will help it reach room temperature faster.

Place the cream cheese in a sealed plastic bag and immerse it in a bowl of warm water for 10-15 minutes. This method is especially useful when you need to soften a larger amount of cream cheese.

FAQ,s

What happens if I use cold cream cheese instead of room temperature cream cheese in my recipe?

Using cold cream cheese in your recipe can result in a lumpy or grainy texture that is not desirable in most baking recipes. Cold cream cheese is harder and more challenging to blend and mix with other ingredients compared to room temperature cream cheese. This can lead to clumps and lumps, which will affect the texture of your baked goods or frosting.

How long does it take for cream cheese to reach room temperature?

It typically takes about 30 to 60 minutes for cream cheese to reach room temperature, depending on the temperature of your kitchen. To speed up the process, you can cut the cream cheese into small cubes and leave it on the counter for about 30 minutes or place it in a sealed plastic bag and immerse it in a bowl of warm water for 10-15 minutes.

Can I use a microwave to soften cream cheese quickly?

Yes, you can soften cream cheese quickly using a microwave. Remove the cream cheese from the packaging and microwave it for 15-20 seconds. Be careful not to overheat it as it can melt and ruin your recipe. It’s best to microwave in short increments and check the consistency after each interval.

Conclusion

The temperature of cream cheese can significantly affect your recipes, especially when it comes to baking. Using room temperature cream cheese creates a smooth, consistent texture, which is essential in many recipes. Cold cream cheese can lead to lumps and grains, making it difficult to blend and mix. When possible, allow cream cheese to reach room temperature before using it in your recipes. If you forget, use one of the tips above to soften it quickly.

How Long Does Baking Powder Last After Expiration Date: A Comprehensive Guide

Baking powder is an essential ingredient in many baked goods, such as cakes, cookies, and bread. However, like all , baking powder has an expiration date, and consuming it after that date can be risky. In this article, we’ll discuss how long baking powder lasts after the expiration date and how to store it properly to extend its shelf life.

What is Baking Powder?

Baking powder is a leavening agent that is commonly used in baking to help baked goods rise. It is a mixture of baking soda, cream of tartar, and cornstarch. When baking powder is combined with a liquid and heated, it produces carbon dioxide gas, which causes the baked goods to rise.

Baking Powder Expiration Date

Like all food products, baking powder has an expiration date. The expiration date is usually printed on the packaging and can range from six months to a year. Consuming baking powder after the expiration date can result in baked goods that don’t rise correctly, leading to a denser and less flavorful end product.

How Long Does Baking Powder Last After Expiration Date?

The good news is that baking powder can last quite a while after the expiration date, as long as it is stored correctly. Baking powder is still effective up to six months to a year after the expiration date, as long as it is still active.

To determine if baking powder is still active, you can perform a simple test. Add a teaspoon of baking powder to a cup of hot water. If it fizzes and bubbles, it is still active and can be used in your baked goods. However, if it doesn’t react, it has lost its potency and should be discarded.

How to Store Baking Powder

To extend the shelf life of baking powder, it is important to store it properly. Baking powder should be stored in a cool, dry place, away from heat and moisture. Keep the baking powder in its original container with the lid tightly sealed to prevent exposure to air, which can cause it to lose potency.

Avoid storing baking powder near the stove or other heat sources, as the heat can cause the baking powder to become less effective. Moisture can also affect the potency of baking powder, so it’s best to keep it in a dry place.

FAQs

Can I use baking powder after the expiration date?

Yes, baking powder can still be used after the expiration date, but it’s important to check its potency before using it. Baking powder can last up to six months to a year after the expiration date if stored properly. To check its potency, mix a teaspoon of baking powder in hot water. If it fizzes and bubbles, it’s still active and can be used in your baking. If it doesn’t react, it has lost its potency and should be discarded.

How should I store baking powder to extend its shelf life?

To extend the shelf life of baking powder, it’s important to store it properly. Baking powder should be stored in a cool, dry place, away from heat and moisture. Keep it in its original container with the lid tightly sealed to prevent exposure to air, which can cause it to lose potency. Avoid storing it near the stove or other heat sources, as the heat can cause the baking powder to become less effective. Moisture can also affect the potency of baking powder, so it’s best to keep it in a dry place.

What happens if I use expired baking powder in my baking?

Using expired baking powder in your baking can result in baked goods that don’t rise correctly, leading to a denser and less flavorful end product. Baking powder is a leavening agent that produces carbon dioxide gas when combined with a liquid and heated. If the baking powder has lost its potency, it won’t produce enough carbon dioxide gas, resulting in baked goods that don’t rise properly. Therefore, it’s important to check the potency of baking powder before using it to ensure the best results in your baked goods.

Conclusion

Baking powder is an essential ingredient in many baked goods, but it has an expiration date like all food products. While it is best to use baking powder before the expiration date, it can still be effective up to six months to a year after the date as long as it is stored correctly. To extend the shelf life of baking powder, store it in a cool, dry place away from heat and moisture, and keep it in its original container with the lid tightly sealed. Remember to perform a simple test to determine if the baking powder is still active before using it in your baked goods.

Butter Up Your Breakfast: Create a Beautiful Butter Board

Are you tired of serving butter in an unappealing plastic container? Looking for a way to add some elegance to your breakfast table? Consider creating your own beautiful butter board! Not only will it impress your guests, but it’s also a fun and easy DIY project.

In this article, we’ll take you through the steps to create a beautiful butter board. From selecting the right materials to the finishing touches, you’ll have everything you need to elevate your breakfast game.

Create a Beautiful Butter Board

Materials:

  • Wood board (choose a hardwood like oak, walnut or maple)
  • Sandpaper (120 and 220 grit)
  • Food-safe mineral oil
  • Beeswax

Choose the right wood board

Select a hardwood board with a smooth surface. Avoid using softwoods like pine, as they can absorb moisture and harbor bacteria. You can purchase pre-made boards or make your own using a saw and sandpaper.

Sand the board

Using 120 grit sandpaper, sand the board until it is smooth to the touch. Then, switch to 220 grit sandpaper and sand the board again. Be sure to sand in the direction of the wood grain to avoid scratches.

Apply mineral oil

Pour a small amount of food-safe mineral oil onto the board and use a cloth to spread it evenly. Let it soak in for 30 minutes, then wipe off any excess. Repeat this process a few times until the board is saturated with oil. This will help protect the wood from moisture and prevent it from cracking.

Apply beeswax

Melt beeswax in a double boiler or microwave-safe container. Using a cloth or brush, apply a thin layer of beeswax to the board. Let it dry for 10-15 minutes, then buff it with a cloth until it shines. This will create a protective layer on the board and make it easier to clean.

Serve your butter in style

Place your homemade butter board on your breakfast table and add a block of butter. You can also add herbs, spices, or other toppings for a beautiful presentation. Your guests will be impressed by your attention to detail, and you’ll enjoy using your new butter board for years to come.

FAQ’s

What kind of wood should I use for my butter board?

It is recommended to use hardwoods such as oak, maple, or walnut. These woods are durable, easy to work with, and have a smooth surface, which makes them ideal for a butter board. Avoid using softwoods like pine, as they can absorb moisture and harbor bacteria.

Is it safe to use beeswax on a butter board?

Yes, it is safe to use beeswax on a butter board. Beeswax is a natural product and has antibacterial properties, making it an ideal choice for a food-safe finish. Just be sure to use food-grade beeswax and melt it in a double boiler or microwave-safe container before applying it to the board.

How should I clean my butter board?

To clean your butter board, simply wipe it down with a damp cloth and mild soap. Do not soak it in water, as this can damage the wood. After cleaning, dry it thoroughly and apply a thin layer of mineral oil to protect the wood. It’s also a good idea to periodically reapply beeswax to maintain the protective layer on the board.

Conclusion:

Creating a beautiful butter board is an easy way to add elegance to your breakfast routine. With just a few materials and some basic woodworking skills, you can make a stunning serving piece that will impress your guests. Follow the steps outlined in this article, and you’ll be on your way to buttering up your breakfast in style!