
Why Houston, TX Chefs Are Inspired by Traditional Japanese Food Techniques
Houston has become one of the most exciting food cities in the United States because chefs constantly explore new ways to improve flavor, presentation, and dini...
Houston has become one of the most exciting food cities in the United States because chefs constantly explore new ways to improve flavor, presentation, and dini...

The best way to make a Homemade Mueller Lasagna Recipe is to layer cooked Mueller lasagna noodles with seasoned meat sauce, ricotta mixture, mozzarella, and par...

Most people think scrambled eggs are the easiest thing to cook. Crack eggs, stir, heat, done. Yet the result often turns dry, rubbery, watery, or bland. That ha...

Have you ever struggled to find time for a healthy lunch while juggling a busy workday? You’re not alone. Whether you’re working from home or at the...

Yukon Territory’s distinctive cuisine reflects its rugged landscape, indigenous heritage, and Gold Rush history. Traditional flavors combine wild game, fr...
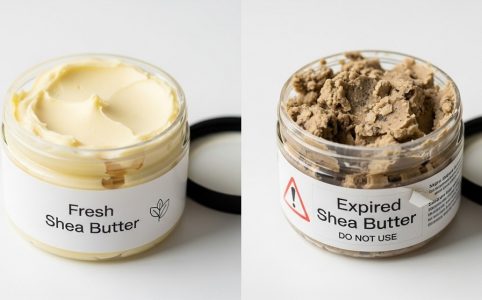
How to tell if shea butter has gone bad is a common question because shea butter looks stable, smells mild, and often lasts for years. But yes—shea butter can g...
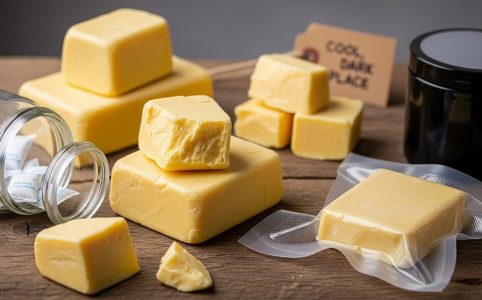
How to prevent cocoa butter from spoiling starts with understanding what cocoa butter is and why it goes bad. Cocoa butter is a natural fat extracted from cocoa...

Jamaican cabbage is a beloved side dish that brings warmth and flavor to any meal. This traditional recipe showcases the island’s rich culinary heritage t...

Imagine packing a lunchbox every morning, only to find it untouched at the end of the day. Picky eating frustrates many parents and caregivers. This common issu...

The first time I swirled a glass of wine at a vineyard tasting, I felt like an impostor. The sommelier spoke of “bouquets” and “tannins,”...