Menu Maker: The App to Create Your QR Menu Design

restaurant menu maker

Going out to eat is one of life’s simple pleasures. As a restaurant owner, you want to provide a fantastic dining experience that will bring customers back again and again. A vital part of that experience is your menu. Your menu lets customers learn about your offerings and builds excitement for the meal ahead. You can showcase your restaurant’s specialty dishes with the right menu design and create mouthwatering descriptions. This is where MenuMaker comes in.

MenuMaker is a revolutionary web app that makes designing your restaurant menu easier. With versatile features and an intuitive interface, you can create a personalized menu that reflects your establishment’s unique flair in minutes. Keep reading to learn how the Menu Maker can take your restaurant’s menu to the next level.

Streamline Menu Creation

MenuMaker provides the tools you need to craft professional restaurant menus effortlessly. The robust editor allows you to add menu sections, categorize dishes, and input detailed item descriptions. Menu items can be easily dragged and dropped to rearrange. Images and icons can also be added to make dishes pop on the page.

It offers a selection of sleek menu templates, including QR menu design. Select a template based on your restaurant’s style, like classic, modern, or minimal. The templates make formatting a breeze so you can focus on perfecting your menu offerings.

Showcase Menu Items

Your menu is your chance to highlight standout dishes and give customers a preview of what makes your restaurant unique. With it, you can create enticing descriptions using an intuitive, rich text editor.

Emphasize your chef’s specialties by including drool-worthy adjectives and cooking methods. Mouthwatering descriptions will have customers eager to order popular menu items. You can also call out healthy, vegetarian, or gluten-free options to cater to diverse dietary needs.

Add Allergens with Ease

Diners want to know what is in the food they order, especially regarding allergens. MenuMaker simplifies allergen identification so customers can make informed choices.

The app allows you to tag menu items with common food allergens like milk, eggs, fish, shellfish, tree nuts, peanuts, wheat, and soybeans. These tags will be highlighted on the menu, making allergen information easy to find. Meeting allergen labeling requirements is a breeze with it.

Seamless Multi-Language Translation

Are you attracting global customers? It enables effortless translation to provide your menu in multiple languages. With a few clicks, your menu can be translated into 100+ languages using Google Translate integration.

Providing menus in customers’ native languages makes your restaurant more inviting to tourists and immigrants alike. The translation feature also saves you the cost of hiring translators.

QR Code Menu for Contactless Ordering

In the digital age, customers want information at their fingertips. With MenuMaker, you can generate a unique QR code that links directly to your menu.

Customers can scan the QR code on their phones to view your menu digitally. This allows for convenient, contactless ordering – perfect for the COVID era. The QR code also serves great branding when included on restaurant signs, tables, and takeout packaging.

Download and Print Menus

Once your menu is complete, MenuMaker makes it easy to download a PDF version or print physical copies. Share the digital PDF online or email it directly to customers. Printed menus can be displayed at tables or handed out by waitstaff.

It is optimized for standard paper sizes like letters and A4. Printed menus maintain your online menu’s vibrant colors, images, and layout. Going from digital to print is seamless.

Manage Your Restaurant’s Online Presence

Your online presence is crucial for reaching today’s tech-savvy diners. It helps boost your restaurant’s visibility by facilitating publishing across the web.

You can post your MenuMaker menu to your restaurant’s Google My Business listing with a few clicks. This allows customers to view your menu and order takeout directly via Google. It also generates a shareable link and embed code to display your menu on your website, Facebook page, Instagram profile, and more.

Getting your menu in front of customers has never been easier. It allows you to sync your menu everywhere your customers are searching.

MenuMaker is the top choice for designing and managing online restaurant menus. The software makes it simple to create customized, enticing menus to match your brand. Diners will be drooling over your offerings in no time!

Frequently Asked Questions

How much does MenuMaker cost?

MenuMaker offers affordable paid plans starting at $8 per month. There is also a free version with limited features to test it out.

Does MenuMaker offer design templates?

Yes, MenuMaker provides professionally designed menu templates in various styles that can be customized. Users can tweak colors, fonts, layouts, and branding.

Can I add pictures to my menu in MenuMaker?

Absolutely. You can upload high-quality food photos to make menu items visually appealing. Images can be arranged creatively throughout your menu.

How do I get my MenuMaker menu on Google?

It’s easy. MenuMaker has Google integration that allows publishing your menu to Google My Business with a click.

Does MenuMaker translate my menu to other languages?

Yes. MenuMaker translates your menu to 100+ languages using advanced Google Translate technology. This is useful for reaching international diners.

The Bottom Line

MenuMaker takes the headache out of menu design. This innovative web app equips restaurants to create stunning digital and print menus in minutes. With gorgeous templates, easy customization, helpful translation, and robust publishing features, It has everything you need to showcase your offerings online or on paper. Ditch the desktop publishing headaches and streamline your menu management with MenuMaker today!

Learn How To Freeze Cupcakes

how to freeze cupcakes
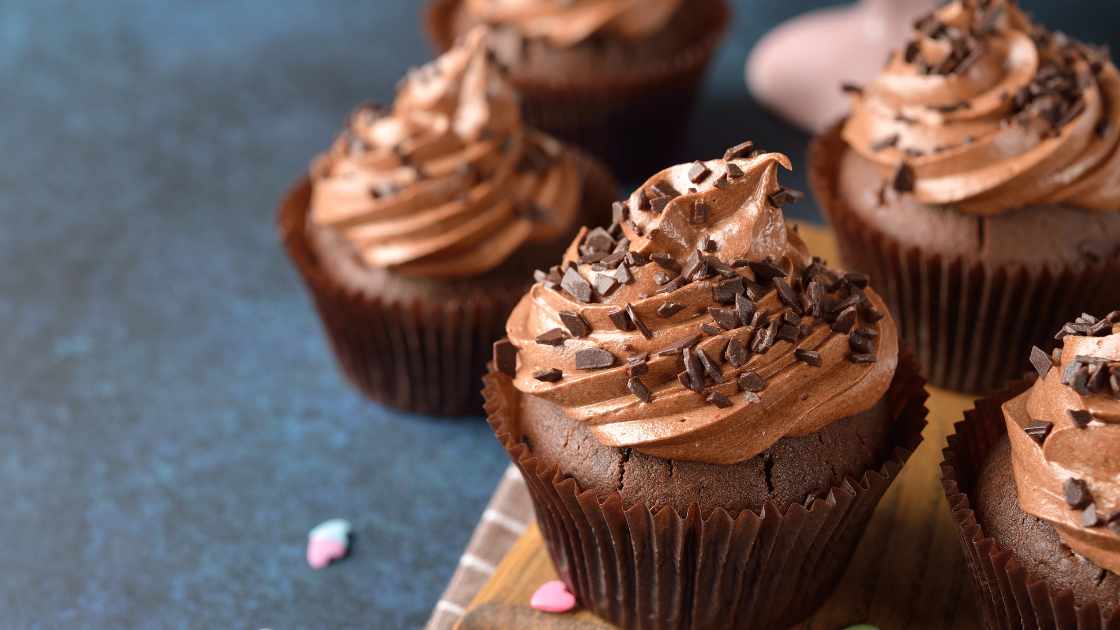
Cupcakes, with their delightful flavors and charming aesthetics, are often an integral part of celebrations. Whether you’ve baked an excess batch or want to prepare in advance for an upcoming event, freezing cupcakes can be a convenient and effective way to preserve their freshness. In this article, we’ll explore the step-by-step process of freezing cupcakes while ensuring they retain their moistness and flavor.

Preserving Sweet Memories: A Guide on How to Freeze Cupcakes

Cooling and Preparation

Before freezing cupcakes, it’s crucial to allow them to cool completely. This prevents condensation from forming inside the storage container, which could lead to sogginess. Once cooled, place the cupcakes on a baking sheet lined with parchment paper, ensuring they are not touching. This initial step helps maintain the individual shapes of the cupcakes during freezing.

Flash Freeze

To prevent cupcakes from sticking together in the freezer, it’s advisable to employ the flash freezing method. Place the baking sheet with the cupcakes in the freezer for about 1-2 hours or until the cupcakes are solid. Flash freezing ensures that each cupcake is individually frozen before they are stored together, minimizing the risk of them sticking to one another.

Airtight Packaging

After the flash freezing stage, transfer the cupcakes to an airtight container or freezer bag. Ensure that the container is sealed tightly to prevent any air from entering, as exposure to air can lead to freezer burn and affect the cupcakes’ texture and flavor. If using a freezer bag, try to remove as much air as possible before sealing.

Labeling and Dating

Maintain organization in your freezer by labeling and dating the container or bag. Include the type of cupcakes and the date they were frozen. This information will help you keep track of the cupcakes’ freshness and assist you in planning for future events or indulgent moments.

Thawing and Serving

When you’re ready to enjoy the frozen cupcakes, it’s essential to thaw them properly. Remove the cupcakes from the freezer and let them thaw at room temperature inside their sealed container or bag. This helps prevent condensation on the cupcakes’ surface. Once thawed, you can add frosting or decorations if desired, restoring them to their freshly baked glory.

Quality Considerations

While freezing cupcakes is a convenient option, it’s important to note that the texture of some cupcakes, especially those with delicate toppings, may be slightly affected. Cupcakes with simple toppings or those that can be frosted after thawing tend to freeze more successfully without compromising quality.

FAQs

Can I freeze cupcakes with frosting?

Yes, you can freeze cupcakes with frosting. However, it’s recommended to flash freeze them first on a baking sheet to prevent the frosting from sticking. Once individually frozen, transfer them to an airtight container or freezer bag to maintain the quality of both cupcakes and frosting.

How long can I store cupcakes in the freezer?

Cupcakes can be stored in the freezer for up to 2-3 months without a significant loss in quality. Be sure to label and date the container or bag for easy tracking. While cupcakes can be frozen for longer periods, it’s advisable to consume them within the recommended timeframe for optimal taste and texture.

Can I thaw frozen cupcakes in the microwave?

While it’s possible to thaw frozen cupcakes in the microwave, it’s not the ideal method. Thawing at room temperature inside their sealed container or bag is recommended to prevent condensation. This helps maintain the cupcakes’ texture and flavor, ensuring they taste as fresh as the day they were baked.

Final Thought

Freezing cupcakes is a practical strategy for preserving the joy of homemade treats and simplifying the preparation process for special occasions. By following these steps, you can ensure that your cupcakes remain delicious and moist, ready to bring smiles to faces even after spending some time in the freezer. Whether you’re planning ahead or looking to save some leftover sweetness, freezing cupcakes is a skill every avid baker should have in their repertoire.

Learn How Long To Cool A Cake

how long to cool a cake
Baking a delicious cake is a delightful experience, but achieving the perfect texture and flavor involves more than just the baking time. The cooling process is equally crucial to ensure your cake turns out moist, tender, and ready to be enjoyed. In this article, we’ll explore the factors that influence the cooling time of a cake and provide guidelines on how long to cool a cake for optimal results.

The Art of Patience: How Long to Cool a Cake for Perfect Results

Factors Affecting Cooling Time

Cake Size and Thickness

The size and thickness of your cake layers play a significant role in determining the cooling time. Larger and thicker cakes retain more heat and, consequently, require a longer cooling period.

Cake Ingredients

The composition of your cake batter can affect the cooling time. Cakes with higher sugar or fat content may take longer to cool due to their insulating properties. Conversely, lighter and less dense cakes may cool more quickly.

Baking Pan Material

The type of baking pan used can influence how quickly or slowly a cake cools. Dark-colored pans absorb and retain more heat than light-colored ones, potentially extending the cooling time.

Room Temperature

The ambient temperature of the room where your cake is cooling can impact the process. Cakes tend to cool more quickly in a cooler environment and more slowly in a warmer one.

Guidelines for Cooling a Cake

Wait for the “Warm to Touch” Stage

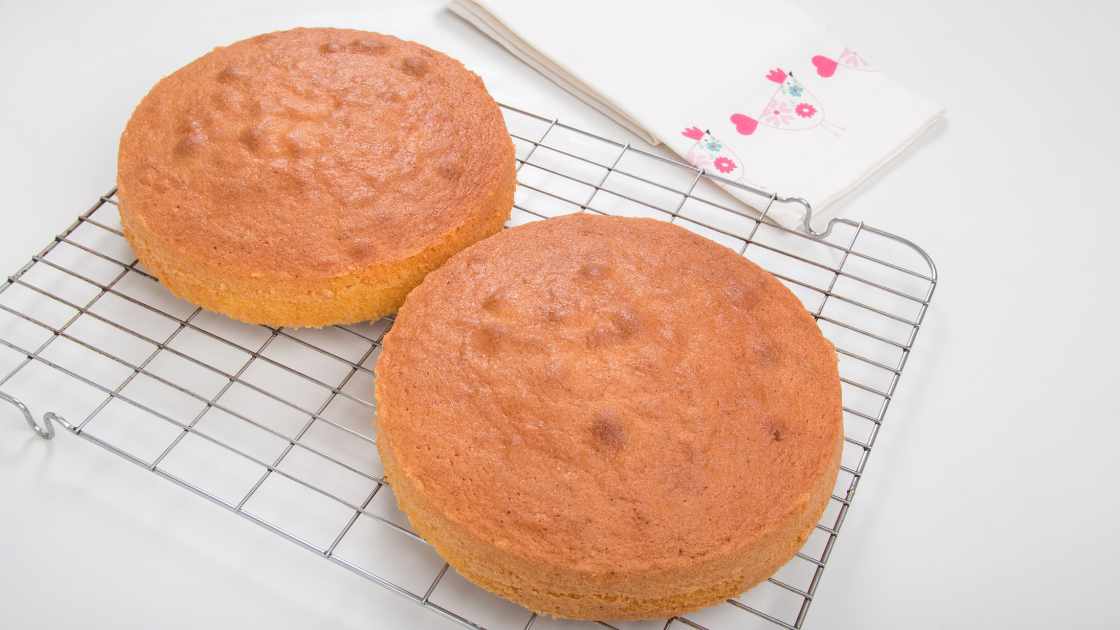
Allow the cake to cool in the pan on a wire rack until it reaches the “warm to touch” stage. This typically takes around 10-15 minutes. At this point, the edges of the cake should begin to pull away from the sides of the pan.

Invert the Cake onto a Cooling Rack

After reaching the “warm to touch” stage, gently invert the cake onto a cooling rack to release it from the pan. This helps prevent the cake from continuing to bake in the hot pan.

Complete Cooling on the Rack

Allow the cake to cool completely on the cooling rack. The total cooling time can vary, but a general guideline is 1-2 hours for a single-layer cake and 2-4 hours for a multi-layer cake.

Refrigerate for Faster Cooling

If time is a constraint, you can place the cake in the refrigerator to expedite the cooling process. Be sure the cake is well-covered to prevent it from drying out or absorbing odors from the fridge.

Frosting and Serving

It’s crucial to wait until the cake is completely cool before applying frosting. Applying frosting on a warm cake can result in a melted or runny consistency. Once cooled, you can decorate and serve your cake to perfection.

FAQs

How long should I let my cake cool before removing it from the pan?

Allow your cake to cool in the pan on a wire rack for approximately 10 to 15 minutes. This “warm to touch” stage helps the cake gently release from the sides of the pan without losing too much moisture.


Is there a specific timeframe for cooling a multi-layer cake?

Yes, after the initial 10-15 minutes in the pan, invert your multi-layer cake onto a cooling rack. For complete cooling, allocate 2 to 4 hours. This ensures an even cooling process, maintaining the cake’s texture and preventing a rushed application of frosting.


Can I speed up the cake cooling process if I’m in a hurry?

Yes, if time is limited, place the cake in the refrigerator to expedite cooling. Ensure it’s well-covered to prevent drying out. While refrigeration can reduce cooling time, maintaining the cake’s quality is crucial for optimal taste and texture.

Final Thought

Mastering the art of cooling a cake is essential for achieving the best possible texture and flavor. By considering factors like cake size, ingredients, and room temperature, and following the guidelines outlined above, you can ensure your cakes are consistently delicious and ready to impress. So, the next time you find yourself waiting for that tempting aroma to fill your kitchen, remember that patience in the cooling process is the secret ingredient to baking success.

Learn How Big Is A Quarter Sheet Cake

How Big Is A Quarter Sheet Cake
Cakes come in various sizes and shapes, making them suitable for a myriad of occasions, from birthdays to weddings and everything in between. One popular size is the quarter sheet cake, appreciated for its convenience and versatility. If you’ve ever wondered about the exact dimensions of a quarter sheet cake, you’re in the right place. Let’s delve into the specifics and unveil the mystery surrounding the size of this beloved baked delight.

Unveiling the Dimensions: How Big is a Quarter Sheet Cake?

Defining a Quarter Sheet Cake

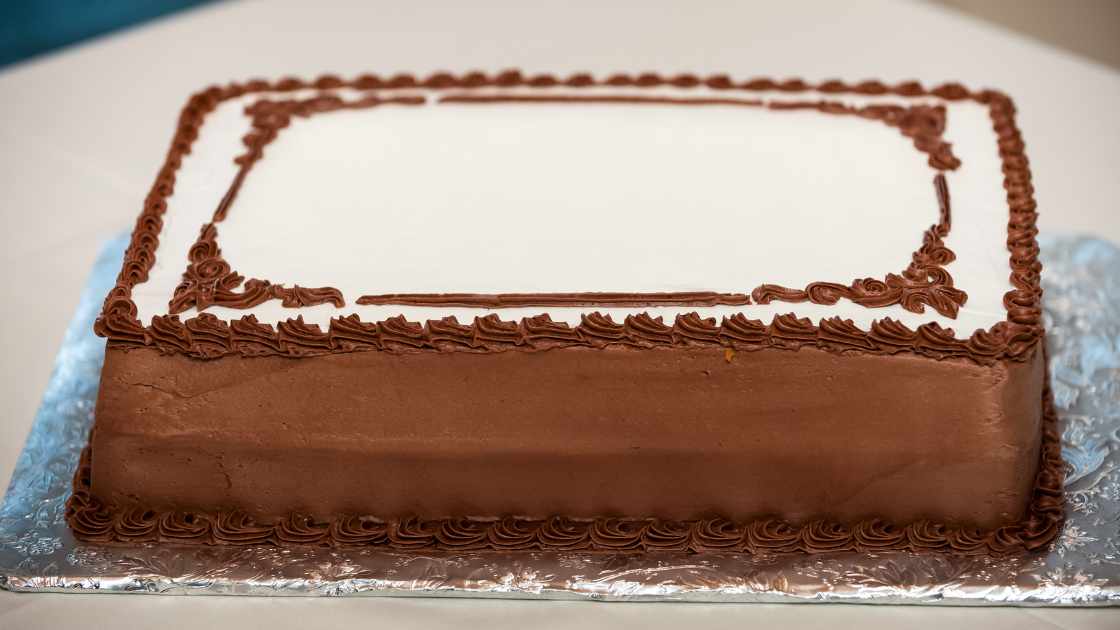
A quarter sheet cake is a rectangular-shaped cake that, as the name suggests, is one-fourth the size of a standard full sheet cake. Full sheet cakes are typically designed for large gatherings, often serving 70 to 100 people. To determine the size of a quarter sheet cake, we need to first understand the dimensions of a full sheet cake.

A full sheet cake traditionally measures 18 inches by 24 inches. This generous size allows for ample servings at events with a substantial guest list. Consequently, a quarter sheet cake, being one-fourth the size, is derived by halving the dimensions of the full sheet cake.

Calculating the Dimensions

To calculate the dimensions of a quarter sheet cake, you would take half of the length and half of the width of a full sheet cake. Therefore, the dimensions of a standard quarter sheet cake are approximately 9 inches by 12 inches. This size makes it a practical choice for smaller gatherings or events where a full sheet cake might be excessive.

Popular Uses of Quarter Sheet Cakes

Due to their manageable size, quarter sheet cakes are popular choices for a variety of events and celebrations. Here are some common uses

Birthday Parties

Ideal for intimate birthday celebrations, a quarter sheet cake provides enough servings to satisfy a smaller group of guests.

Office Parties

When celebrating achievements or milestones at the workplace, a quarter sheet cake offers a delicious treat without overwhelming the office.

Family Gatherings

Whether it’s a casual family dinner or a holiday gathering, a quarter sheet cake is a convenient dessert option.

Special Occasions

Graduations, promotions, and other special occasions can be commemorated with a quarter sheet cake to add a touch of sweetness to the festivities.

FAQs

How big is a quarter sheet cake?

A quarter sheet cake is typically 9 inches by 12 inches in size. It is a rectangular-shaped cake, and its dimensions are one-fourth of a standard full sheet cake, making it a convenient option for smaller gatherings.


How many servings can I expect from a quarter sheet cake?

On average, a quarter sheet cake can yield around 18 to 24 servings, depending on the size of the slices. This makes it a practical choice for intimate celebrations, such as birthdays, family gatherings, or office parties.


What occasions are suitable for a quarter sheet cake?

Quarter sheet cakes are versatile and perfect for a range of occasions. They are commonly chosen for birthday parties, office celebrations, family dinners, and other smaller events where a full sheet cake may be too large. The manageable size and delicious taste make them a popular choice for various special occasions.

Final Thought

In conclusion, a quarter sheet cake is a versatile and convenient option for various events, providing a delicious treat without the excessiveness of a larger cake. Understanding its dimensions, approximately 9 inches by 12 inches, allows you to plan accordingly for your next celebration. So, the next time you’re contemplating the perfect cake size for a smaller gathering, consider the delightful and practical choice that is the quarter sheet cake.

Learn How Many Cups Of Sugar In A Pound

how many cups of sugar in a pound
In the world of baking and cooking, precise measurements are crucial for achieving the perfect balance of flavors and textures. When it comes to sugar, a common question arises: How many cups are there in a pound? In this article, we’ll unravel the mystery behind this common kitchen conversion, ensuring your recipes turn out just right.

Demystifying Measurements: How Many Cups of Sugar in a Pound?

Understanding Sugar Density

Before delving into the conversion, it’s essential to grasp that not all ingredients have the same density. Sugar, in particular, can be packed or loosely measured, affecting the number of cups in a pound.

Granulated Sugar

For granulated sugar, the standard measurement is that there are approximately 2 cups in a pound. This assumes a lightly packed cup, where the sugar is not tightly pressed down or compacted. Keep in mind that the actual number can vary slightly based on factors like humidity and the specific type of granulated sugar.

Brown Sugar

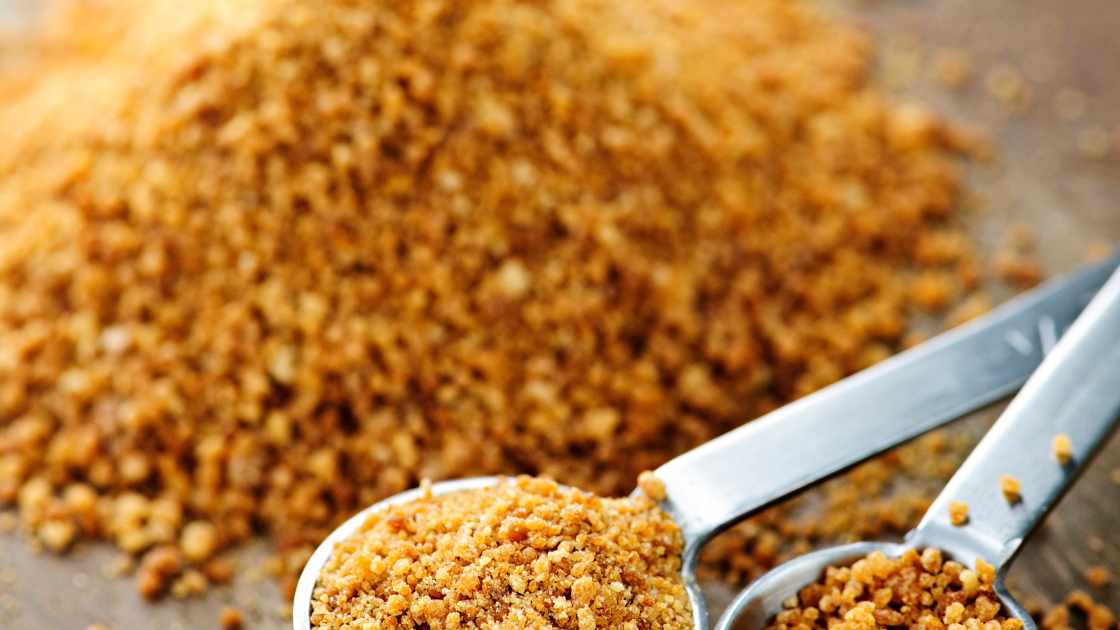
Brown sugar, whether light or dark, is slightly denser than granulated sugar due to the molasses content. As a result, there are approximately 2 1/4 cups of brown sugar in a pound. Again, this measurement is based on a lightly packed cup.

Powdered Sugar

Powdered sugar, also known as confectioners’ sugar or icing sugar, has a finer texture. There are roughly 3 3/4 cups of powdered sugar in a pound when lightly sifted or spooned into the measuring cup.

Tips for Accurate Measurement

To ensure accuracy in your recipes, follow these tips when measuring sugar

Use the Right Type of Measuring Cup

Use dry measuring cups for granulated and brown sugar and a sifter or spoon for powdered sugar. Liquid measuring cups may lead to inaccurate measurements.

Fluff and Spoon

Before measuring, fluff up the sugar in its container with a spoon to avoid compaction. Then, spoon the sugar into the measuring cup and level it off with a flat edge for an accurate measurement.

Consider Humidity

Humidity can affect the moisture content of sugar, impacting its weight. In humid conditions, it’s advisable to fluff the sugar more and adjust measurements as needed.

Faqs

How many cups of granulated sugar are there in a pound?

Generally, there are approximately 2 cups of granulated sugar in a pound. This measurement is based on a lightly packed cup, and it’s important to fluff the sugar before measuring to avoid compaction.


Does the type of sugar affect the number of cups in a pound?

Yes, the type of sugar can impact the measurement. For brown sugar, whether light or dark, there are about 2 1/4 cups in a pound due to its denser molasses content. Powdered sugar, with its finer texture, yields approximately 3 3/4 cups in a pound when lightly sifted or spooned.


Why is it important to consider humidity when measuring sugar?

Humidity can affect the moisture content of sugar, potentially impacting its weight. In humid conditions, it’s advisable to fluff the sugar more before measuring and adjust quantities as needed to maintain recipe accuracy. Taking environmental factors into account ensures consistent results in your culinary endeavors.

Final Thought

Knowing how many cups of sugar are in a pound is a valuable piece of information for anyone who enjoys spending time in the kitchen. While these measurements provide a general guideline, it’s crucial to consider factors like the type of sugar and environmental conditions. By mastering these measurements, you’ll be better equipped to execute recipes with precision, ensuring that your culinary creations are a sweet success.

Learn How Big Is A Half Sheet Cake

How Big Is A Half Sheet Cake
When it comes to celebrations, a delicious cake is often at the center of attention. From birthdays to weddings and everything in between, cakes come in various shapes and sizes to suit the occasion. One popular size that frequently graces dessert tables is the half sheet cake. In this article, we will delve into the dimensions of a half sheet cake, offering insights into its size and the number of servings it can provide.

Unveiling the Dimensions of a Half Sheet Cake

Defining a Half Sheet Cake

A half sheet cake is a rectangular-shaped cake that measures approximately 13 inches by 18 inches. This size is a standard in the baking industry and is widely used for its versatility. The dimensions are chosen to accommodate a variety of designs and decorations while ensuring a practical and manageable size for both baking and serving.

Dimensions and Servings

Understanding the dimensions of a half sheet cake is crucial for planning and serving at events. With a surface area of 234 square inches, a half sheet cake is often recommended for gatherings of 20 to 40 people, depending on the serving size. It provides a generous amount of cake for guests to enjoy without overwhelming the table.

It’s essential to note that serving size can vary based on the occasion and the presence of other desserts. For larger events where multiple dessert options are available, smaller servings may be appropriate. Conversely, for intimate gatherings with limited dessert choices, larger servings can be offered.

Customization and Design

One of the key advantages of a half sheet cake is its ample surface area, allowing for creative and intricate designs. Bakers and decorators appreciate the space available to craft visually appealing cakes for various celebrations. Whether it’s a themed birthday cake, an elegant wedding cake, or a festive holiday creation, the half sheet cake provides a canvas for artistic expression.

Transportation and Handling

While the half sheet cake offers a generous serving size, it’s important to consider practical aspects such as transportation and handling. Bakers often use sturdy sheet cake boards and boxes to support and protect the cake during transit. The rectangular shape and manageable size make it easier to transport without the challenges associated with larger cakes.

Faqs

How big is a half sheet cake?

A half sheet cake typically measures around 13 inches by 18 inches, creating a rectangular shape. This standard size is widely used in the baking industry for its versatility and practicality.


How many servings does a half sheet cake provide?

A half sheet cake is designed to serve approximately 20 to 40 people, depending on the serving size. With a surface area of 234 square inches, it offers ample portions for a variety of occasions.


What occasions are suitable for a half sheet cake?

A half sheet cake is versatile and ideal for various celebrations, including birthdays, weddings, anniversaries, and other special events. Its ample surface area allows for creative designs, making it a popular choice for both intimate gatherings and larger parties.

Final Thought

In conclusion, a half sheet cake is a versatile and popular choice for many celebrations, offering a balance between size, servings, and creative possibilities. Understanding its dimensions and serving capacity is essential for planning events and ensuring a delightful experience for guests. Whether you’re a baker preparing a masterpiece or a cake enthusiast eager to enjoy a slice of celebration, the half sheet cake is a delightful canvas for sweet memories.

Learn How Much Is The Big Breakfast With Hotcakes At Mcdonald’s

how much is the big breakfast with hotcakes at mcdonald's
McDonald’s, a global fast-food giant, is renowned for its diverse menu that caters to a variety of taste buds. One of the breakfast favorites that has captured the hearts of many is the Big Breakfast with Hotcakes. In this article, we will explore the delicious details of this hearty morning meal and provide insights into its cost.

Unveiling the Delight: How Much is the Big Breakfast with Hotcakes at McDonald’s?

The Big Breakfast with Hotcakes

The Big Breakfast with Hotcakes is a delightful combination of classic breakfast items that is sure to satisfy even the heartiest of appetites. This iconic McDonald’s breakfast platter typically includes scrambled eggs, hotcakes, sausage, hash browns, and a biscuit. It’s a substantial and flavorful option for those looking to kickstart their day with a hearty meal.

Pricing

As of my last knowledge update in January 2022, prices at McDonald’s can vary based on location, local economic factors, and individual franchise decisions. It’s important to note that prices may have changed since then, so it’s advisable to check with your local McDonald’s for the most accurate and up-to-date pricing information.

On average, the Big Breakfast with Hotcakes tends to be priced higher than some other breakfast items on the McDonald’s menu due to its larger portion size and the variety of items included. Prices typically range from $5 to $7, but this can vary.

Factors Influencing Price

Several factors contribute to the pricing of the Big Breakfast with Hotcakes at McDonald’s:

Location: Prices can vary by region and country due to differences in the cost of living and operating expenses.

Franchise Ownership: Individual franchise owners may have some flexibility in setting prices based on local market conditions.

Meal Customization: Any modifications or additions to the standard Big Breakfast with Hotcakes may affect the overall cost.

FAQs

How much does the Big Breakfast with Hotcakes cost at McDonald’s?

As of my last knowledge update in January 2022, the price of the Big Breakfast with Hotcakes at McDonald’s varies by location and can range from $5 to $7. However, it’s crucial to note that prices may have changed, so it’s advisable to check with your local McDonald’s for the most current pricing information.


Does the cost of the Big Breakfast with Hotcakes differ based on the region?

Yes, the cost of the Big Breakfast with Hotcakes can vary depending on the region and country. McDonald’s adjusts its prices based on factors such as the local cost of living and operating expenses. To get the most accurate pricing information, it’s recommended to check with the specific McDonald’s restaurant in your area.


Are there any additional factors that might affect the price of the Big Breakfast with Hotcakes?

Yes, several factors can influence the price of the Big Breakfast with Hotcakes. Individual franchise owners may have some flexibility in setting prices, and any modifications or additions to the standard meal can also impact the overall cost. For the latest and most precise pricing details, it’s best to inquire directly at your local McDonald’s or visit their official website.

Final Thought

The Big Breakfast with Hotcakes at McDonald’s is a breakfast option that has stood the test of time, winning the hearts of breakfast enthusiasts around the world. While prices may vary based on location and individual preferences, the satisfaction derived from this classic meal remains consistent. For the most accurate pricing information, it’s always a good idea to check with your local McDonald’s or visit their official website. So, the next time you’re craving a hearty breakfast, consider indulging in the delicious and filling Big Breakfast with Hotcakes at your nearest McDonald’s.


Learn How To Know When Pancakes Are Done

how to know when pancakes are done

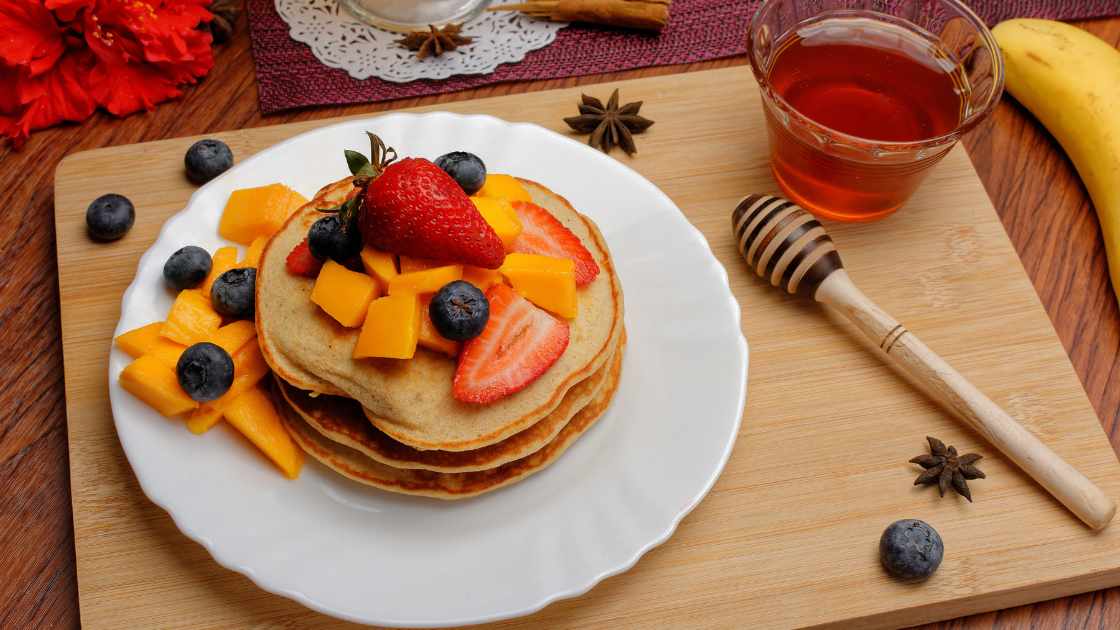
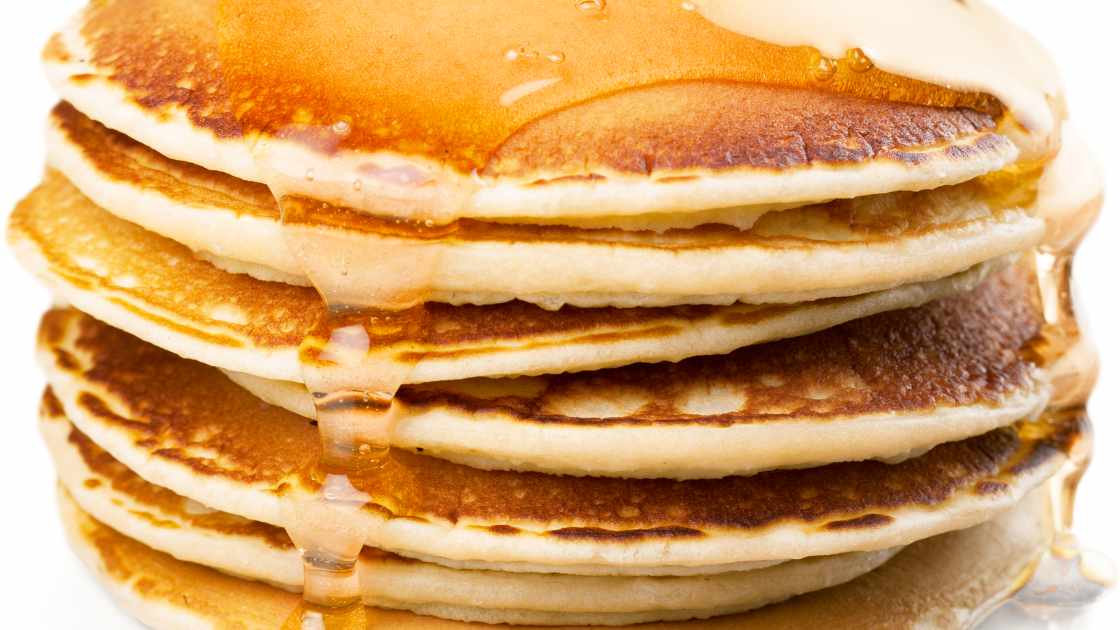
Few breakfast delights rival the simple pleasure of a stack of perfectly cooked pancakes. Achieving that ideal balance of golden-brown deliciousness and fluffy interior can be an art form in itself. Whether you’re a novice in the kitchen or a seasoned pancake enthusiast, mastering the skill of determining when pancakes are done is essential. In this guide, we’ll explore the key indicators that will help you confidently declare your pancakes ready for the breakfast table.

A Pancake Perfectionist’s Guide: How to Know When Pancakes Are Done

Bubbling Batter

One of the earliest signs that your pancakes are on the right track is the formation of bubbles on the surface. As the batter cooks, bubbles will start to appear and pop, indicating that the bottom side is cooking and the edges are starting to set. Once the majority of bubbles have burst and the edges look firm, it’s time to move on to the next step.

Edge Firmness

Gently lift the edge of a pancake with a spatula to check for firmness. If the edge easily lifts without any resistance and is golden brown, it’s a good indication that it’s time to flip. The entire pancake should be firm around the edges but still soft in the center.

Golden-Brown Perfection

The golden-brown color is a universal sign of a well-cooked pancake. Once flipped, the second side should also achieve the same desirable hue. Keep an eye on the color, and when both sides are evenly golden brown, your pancakes are likely cooked to perfection.

Fluffiness Test

To ensure your pancakes are light and fluffy on the inside, gently press the center with the back of your spatula. If it springs back, it’s a good indication that the inside is cooked. If it leaves an indentation, the pancakes may need a bit more time on the griddle.

Temperature Check

Using the right cooking temperature is crucial for achieving perfectly cooked pancakes. Too high a heat can lead to uneven cooking, while too low a heat may result in pale and soggy pancakes. Aim for a medium heat setting on your griddle or stove, and adjust as needed.

Consistency Is Key

Cooking times may vary depending on the size of your pancakes and the specific recipe you’re using. However, maintaining consistency is crucial. If you find a cooking time that works well for your first pancake, try to replicate it for the rest of the batch.

Practice Makes Perfect

Becoming an expert pancake chef takes practice. Don’t be discouraged if your first attempt isn’t flawless. Pay attention to the cues, learn from each batch, and soon you’ll have the knack for achieving consistently delicious pancakes.

FAQs

How do I know when it’s time to flip my pancakes?

Look for bubbles on the surface of the pancake. When bubbles start forming and popping, particularly around the edges, it’s an indication that the bottom side is cooking. Gently lift the edge with a spatula – if it’s golden brown and firm, it’s ready to be flipped.


What’s the key to achieving the perfect golden-brown color on pancakes?

Achieving that ideal golden-brown hue is crucial for delicious pancakes. Once you’ve flipped your pancakes, keep an eye on the color. When both sides are evenly golden brown, it’s a sign that they are cooked to perfection. This visual cue ensures a delightful balance of flavor and texture.


How can I ensure my pancakes are fluffy on the inside?

To ensure fluffiness, perform the “fluffiness test.” Gently press the center of the pancake with the back of your spatula. If it springs back, the inside is likely cooked, and your pancakes are ready. If it leaves an indentation, give them a bit more time on the griddle, ensuring a light and airy texture.

Final Thought

Knowing when pancakes are done is a combination of visual cues, texture, and a bit of intuition. By paying attention to the bubbling batter, edge firmness, golden-brown color, fluffiness, and maintaining the right temperature, you’ll be well on your way to creating a stack of pancakes that will delight your taste buds every time. So, fire up that griddle, grab your spatula, and get ready to flip your way to pancake perfection!

Learn How Long Does Cake Disposable Last A Comprehensive Guide

how long does cake disposable last
When it comes to planning events, parties, or even a simple family gathering, disposable cakeware has become a popular choice for its convenience and ease of use. However, like any other disposable product, cake disposables also have a limited shelf life. In this article, we will explore the factors that influence the longevity of cake disposables and provide insights on how long you can expect them to last.

Understanding the Shelf Life of Cake Disposables: How Long Do They Last?

Material Matters

The material used in the production of cake disposables plays a crucial role in determining their shelf life. Common materials include paper, plastic, and foam. Paper-based cake disposables are generally biodegradable and eco-friendly but may not hold up as well to moisture. Plastic disposables, on the other hand, are more durable but may take longer to decompose. Foam is lightweight and often chosen for its insulation properties, but it may break down over time.

Storage Conditions

Proper storage is essential to extend the shelf life of cake disposables. Exposure to heat, humidity, or direct sunlight can accelerate the degradation of materials, causing them to become brittle, discolored, or warped. It is advisable to store cake disposables in a cool, dry place, away from extreme temperatures and moisture. Additionally, keeping them in their original packaging can help protect them from external elements.

Time Frame

The expected lifespan of cake disposables varies depending on the type and quality of the product. In general, most cake disposables are designed to last for several months if stored correctly. However, it’s crucial to check the manufacturer’s guidelines on the packaging for specific information about the recommended shelf life. Using cake disposables beyond their suggested expiration date may compromise their integrity and safety.

Consider the Type of Cake

Certain types of cakes or desserts may have different effects on disposable materials. For example, cakes with high moisture content or creamy toppings may cause paper-based disposables to become soggy more quickly. It’s essential to factor in the specific characteristics of the cake you plan to serve when choosing disposable cakeware.

Environmental Impact

While the convenience of disposable cakeware is undeniable, it’s crucial to consider the environmental impact of these products. Opting for eco-friendly disposables made from sustainable materials can align with your commitment to reducing waste and promoting a greener lifestyle.

FAQs

How long can I store cake disposables?

The shelf life of cake disposables depends on factors like material and storage conditions. In general, they are designed to last several months, but it’s crucial to check the manufacturer’s guidelines for specific recommendations.

Can I use cake disposables after their expiration date?

Using cake disposables beyond their suggested expiration date is not recommended. The materials may degrade, compromising their integrity and safety. Always adhere to the manufacturer’s guidelines for optimal use.

Do different types of cakes affect the lifespan of disposables?

A3: Yes, the type of cake matters. Cakes with high moisture content or creamy toppings may impact paper-based disposables more quickly. Consider the characteristics of your cake when choosing disposable cakeware for optimal performance.

Final Thought

In conclusion, the longevity of cake disposables depends on various factors such as the material, storage conditions, and the specific type of cake being served. By choosing high-quality disposables, storing them properly, and being mindful of their limitations, you can ensure that your cake disposables last as long as possible. Additionally, considering the environmental impact of your choices can contribute to a more sustainable approach to hosting events and celebrations.